Working with Reports
This
article describes how to create reports, publish them to the Reporting Web site
and schedule them for archival or email delivery.
In Netaphor SiteAudit™ 4.0, all reports are created from one of the 14 SiteAudit
views. The flexibility of views to
filter, organize and aggregate data allows users to build hundreds of unique
views. Views can be saved and reopened in
the SiteAudit viewer, published to the Reporting Web site for access over the
Internet or scheduled for delivery to email recipients or an archival
location.
All
Integrated and scheduled reports that existed in SiteAudit 3.x have been
eliminated. However, all of these reports and more can be created using one of
the existing SiteAudit 4.0 views.
Designing
and scheduling reports is much easier in SiteAudit 4.0 and the same reports
that can be saved or published can be scheduled for periodic archival or email
delivery. SiteAudit 4.0 supports the new
scheduled report file types: PDF, XLS and RTF.
Contents
Feature Overview
All
reports in SiteAudit 4.0 are generated from a view. It is now possible to create many new types
of reports, as well as reproduce reports from older versions of
SiteAudit. Any view in SiteAudit can be
customized and saved in various formats that include PDF, CSV, RTF, HTML and
XLS. These views can be immediately
emailed, exported or saved, then published to a web site or scheduled for
archival or email delivery.
Since
scheduled reports are created from a view like all other reports in SiteAudit
4.0, report creation is much easier than it had been in earlier versions of
SiteAudit. Custom stylesheets and filter
documents are no longer required to produce customized reports. It is still possible to customize reports
using stylesheets, but filter documents are no longer needed. In SiteAudit 4.0, users can customize views
and filter them using existing view-filtering capabilities, then style a report using new layout functions. Once a view is customized as
desired, it can be emailed, archived, exported, printed or published to a
website.
This
article describes how to create reports, publish them to the Reporting Web site
and schedule them for archival or email delivery. To read more information about customizing
the views from which reports are derived, refer to the SiteAudit knowledgebase
article Customizing Views.
Creating a Report from a SiteAudit View
A SiteAudit report can be created from any view. The first step to creating a report is to
customize the view from which the report is derived. For instance, a report can be customized from
the Consumables view to show all the toner cartridges replaced over the past month. The view can be organized to hide or show particular columns of data,
grouped to show the replaced cartridges by manufacturer and model or
configured in other ways as described in the help article Customizing Views.
Once the view has been customized as desired, report and scheduling information
can be added to the view and saved. The
following sections describe how to create a customized report.
Customizing a Report
Once a view has been configured as desired, it can be saved or delivered
as a report. However, it is first necessary to configure the view report
options. This section describes the
customization options available for reports.
The Reports menu has changed in SiteAudit 4.0 and is shown in Figure
1. This section describes how to use the
File Format options and the Layout to customize a report. The
remainder of the document describes how to Email and Export a report. To
learn how to publish and scheduled reports, refer to the SiteAudit
articles Publishing Views
and Scheduling Reports.
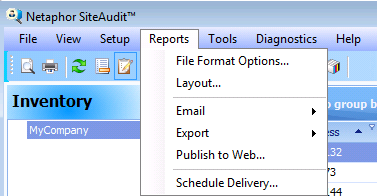
Figure 1: SiteAudit Reports menu
File Format Options
The File Format
Options allow users to configure the options for the desired report type. Figure 2 shows an example of the File Format
Options dialog. Since reports can be
delivered in any file format, users may want to be sure that the default
options for XLS, CSV and XML are configured as desired. For most reports the default settings are adequate.
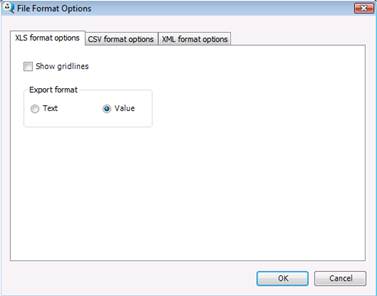
Figure 2: File Format Options Dialog
The available report
formats include RTF, HTML, XLS, CSV and XML. No format options exist for PDF, RTF and HTML reports, thus options
exist only for XLS, CSV and XML.
XLS Format Options
SiteAudit 4.0 supports the creation of reports in the Microsoft Excel
format XLS. Figure 3 shows the XLS format
options.
Figure 3: XLS File Format Options
Check the Show
gridlines box to show the gridlines in the Excel report.
There are two options for the Export format: Text and Value. Value is the default option. When the Value
option is selected, the cell values will use the same formatting that is used
in the view. When the Text option is selected, all values will
be treated as strings with the corresponding formatting embedded into those
strings.
CSV Format Options
SiteAudit 4.0 supports the creation of reports in the CSV format. Figure 4 shows the available CSV format
options. By default, the Quote strings with
separator checkbox is selected. When
a Separator is found inside a value, then the value is surrounded by quotes to
prevent the character from behaving like a separator.
Users can choose a predefined Separator or choose Other to insert a unique separator.
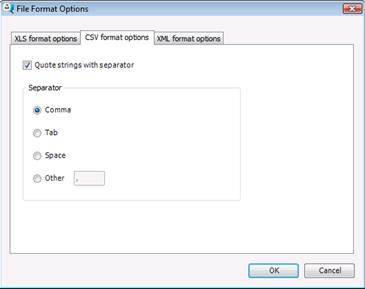
Figure 4: CSV File Format Options
XML Format Options
SiteAudit 4.0 supports reports in the XML format and allows for
specifying an XSL stylesheet to transform and style the report. This allows users to create reports that
contain their own customization. It also supplies backward compatibility for
scheduled reports produced with versions of SiteAudit prior to 4.0.
The XML format options also include a way to
specify a filter document for filtering data prior to applying the
stylesheet. Again, this is for backward
compatibility, as filtered documents are no longer needed in SiteAudit 4.0. Users can filter data in the view using the
standard filter control that has always been a part of SiteAudit.
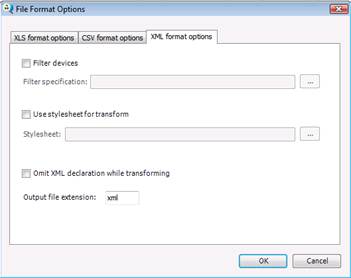
Figure
5: XML File Format Options
Filter Devices
For users who want to create reports using a filter document that
describes what to include in the report, check the Filter devices checkbox and
enter the filter document name and path in the Filter specification.
Use Stylesheet for Transformation
The XML format options provide a
way for users to specify an XSL stylesheet to transform the XML report content
into a preferred style. This option is
used to create reports that are not possible using an existing view. For instance, some users may want to
transform data into a format that can be input into another program or database
and may require special formatting. In this case, a custom stylesheet would be
appropriate. To use an XSL stylesheet to
transform the XML report, select the Use
stylesheet for transformation checkbox and enter the name and path of the
stylesheet in the Stylesheet textbox.
Omit XML Declaration
The Omit XML declaration while transforming
option removes the XML declaration from the XML report and supports backward
compatibility for scheduled reports created with SiteAudit versions prior to
4.0. This option is useful when the
declaration is not needed in the XML report.
Output file extension
The Output file
extension is the extension that will be applied to the report when it is
created. By default, the report extension
is XML; however, if your stylesheet transforms the report into another format
(such as CSV, TXT, HTML, et cetera), then enter the desired extension in the Output file extension textbox.
Layout Configuration
The Layout Configuration dialog allows users
to add report styling information that is saved with the view. Users can customize a report by modifying the
page layout and margins, adding footers, headers, watermarks, page number
information, et cetera. This section
describes the options available in the Layout
Configuration dialog.
The Layout Configuration dialog can be
opened by selecting the Reports >
Layout menu item.

Figure 6: Layout Configuration Dialog
Title
The title of the
report should be entered into the Title textbox.
Devices to Include
The Devices to Include option allows users
to specify which devices to include in the report. Each option is explained
below.
- All – include all discovered printers in the report
- Active printers only – include only active printers
- As configured in the viewer – include only devices that are configured to appear in the viewer
Print Options
The print options
allow users to change various aspects of the page. Each option is described below.
Header and Footer
The header and footer
options allow users to enter various data in the report footer and header. For instance, users can include a page number,
date and time when the report was printed, the user name or custom text. A font can be configured separately for the
header and footer. An example report
with header information is shown in Figure 8.
The Header and Footer dialog can be opened
by clicking the Header/Footer button
in the Layout Configuration
dialog.
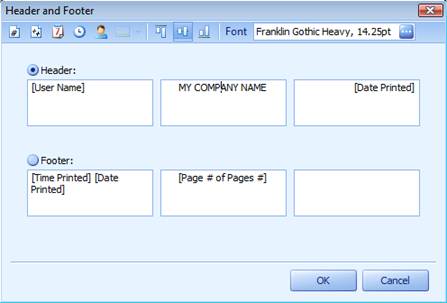
Figure 7: Header and Footer Dialog
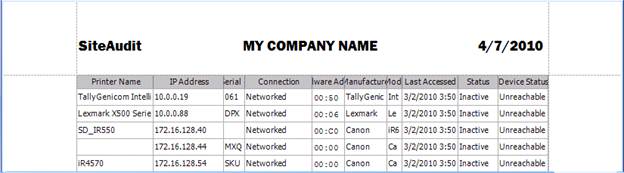
Figure 8: Example Report with Header
Print Options Dialog
The Print Options dialog can be opened by
selecting Options from the Layout Configuration dialog. The Print
Options dialog contains a tab for Options
and one for Behaviors. It also contains a
sample preview section as shown in Figure 9. It is also possible to see how the actual report will look by clicking
the Apply button and viewing the
report in the Layout Configuration
dialog. The settings applied in the
Print Options dialog will be saved with the report whether or not the report is
printed.
The following sections
describe each option in the Options tab.
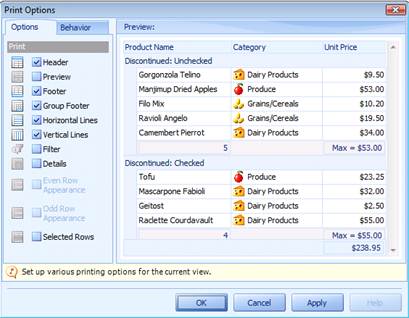
Figure 9 – Report Options
Options
- Header
Select this option to
display the header on a SiteAudit report. - Footer
Select this option to
display the footer in the SiteAudit report. - Group Footer
Select this option
when the view has been grouped by one or more columns and aggregates are
displayed for each group. If this option
is selected, the grouped footer will be displayed in the report. The Figures below show an example of a
grouped footer that shows the number of rows in each group.
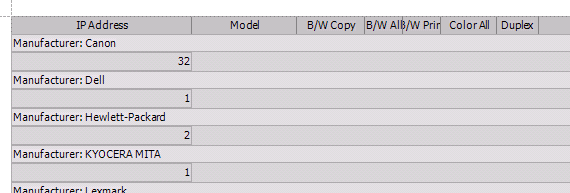
Figure 10: Grouped Filters. Shows the number of
each manufacturer devices
- Horizontal Lines
Select this option to
show horizontal lines between rows in the SiteAudit report. - Vertical Lines
Select this option to show vertical lines between columns in the SiteAudit report. - Filter
Select this option to display the view filter information in the report. -
Details
Selecting Details
expands the rows in a view to display the detail information. Select this
option if a view contains sub-view details.
Currently, there are several views in SiteAudit that contain details.
These include: Summary, Inventory, Problem Analysis, Configuration Details and
Discovery Progress. Figures 11 and 12 below
show a report with and without Details selected.
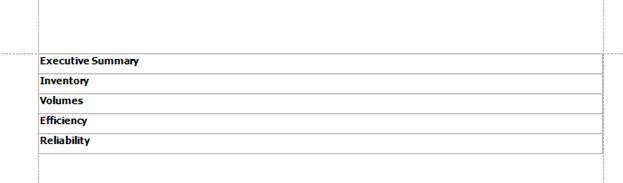
Figure 11: Example Summary View without Details
Selected
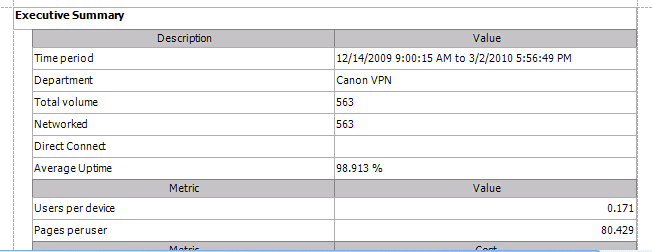
Figure 12: Example Summary View with Details
Selected
- Selected Rows
When this option is
selected, the only device data that will be included in the report are the rows
that are selected in the view.
Behaviors
The following sections
describe each of the Behavior options
- Auto Width
When the Auto Width
option is selected, SiteAudit will display all columns within the defined page
borders. When this option is not
selected, the widths of the view columns are used. This means that if the column widths exceed
the width of the page, the columns that do not fit on the page will be inserted
onto a new page. -
All Details
When this option is
selected, all of the view details will be expanded in the report. -
All Groups
When this option is
selected, all of the groups will be expanded in the report even if they are not
expanded in the view.
Margins
The report page
margins can be set by clicking the Margins
button in the Layout Configuration
dialog and choosing one of the layouts shown in Figure 13 below or by choosing
Custom Margins… and setting the
margins manually.
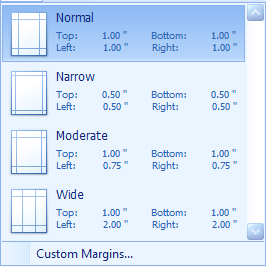
Figure 13: Layout Configuration Margins
Selecting Custom Margins… will display the Page Setup dialog that allows the user
to configure the page setup manually. See the Page Setup dialog
below:
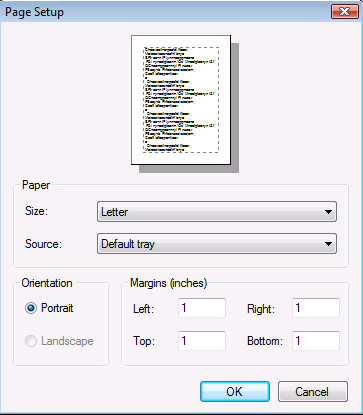
Figure 14: Page Setup Dialog
Orientation
The report page
orientation can be configured by selecting Orientation from the Layout
Configuration dialog. The figure below
shows the available options.
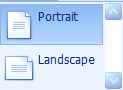
Figure 15: Page Orientation options
Size
The paper size can be
selected by clicking the Size button in the Layout Configuration dialog and
choosing the desired page size. The
figure below shows some of the available size options.
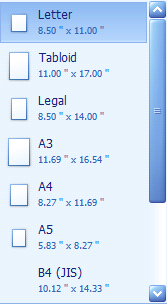
Figure 16: Paper Size Options
Scale
Scaling a page allows
more or less information to be displayed in the report. To scale the report, select Scale from the
Layout Configuration dialog and enter the desired information into the Scaling
dialog shown below.
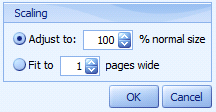
Figure 17: Scale Options
Page Color
The background page
color can be selected by clicking the Page Color button in the Layout
Configuration dialog. The figure below
shows the available options.
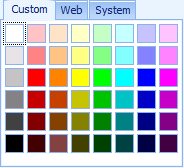
Figure 18: Page Background Color Options
Watermark
Users can add a
watermark to a report by selecting the Watermark button from the Layout
Configuration dialog and entering the desired information.
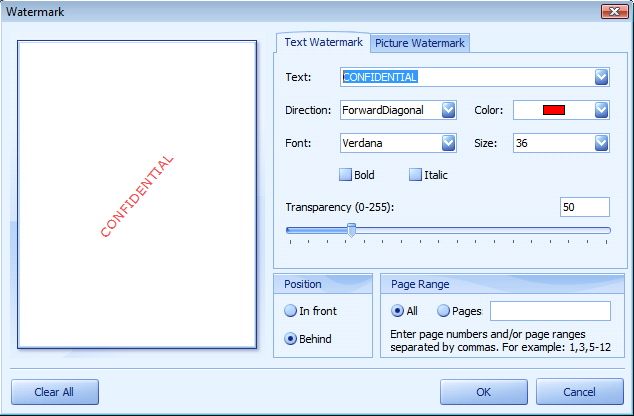
Figure 19: Watermark Options
It is also possible to
include graphical watermarks by selecting the Picture Watermark tab and
entering the desired information.
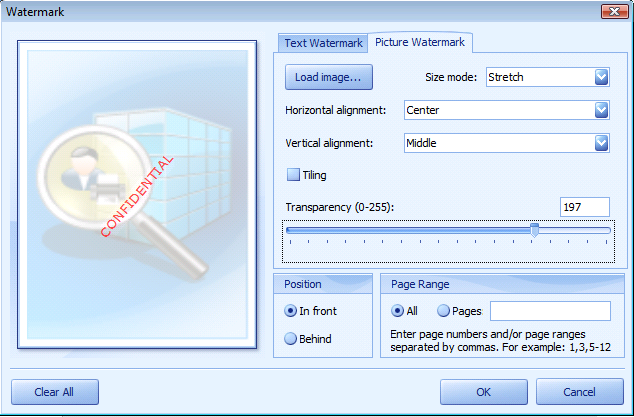
Figure 20: Watermark Picture Options
Emailing a
SiteAudit Report
Emailing a report in
SiteAudit 4.0 is very easy. Reports can be emailed as an attachment and can be
formatted as PDF, XLS, CSV, HTML or RTF. To email a report, an email client must exist on the machine where the
SiteAudit Viewer is installed. Select
the report type from the Reports >
Email menu items. Once a format is
selected, the email client will be opened automatically and the report will be
attached to the email. The user must
enter the recipients and send the email.
The figure below shows the Email menu items.
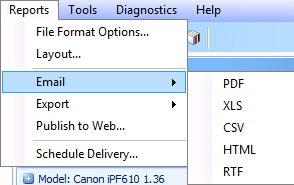
Figure 21: Reports Email Options
Exporting a SiteAudit Report
It has always been
possible to export views in SiteAudit.
However, SiteAudit 4.0 provides the ability to export reports as
well. Reports can be exported and saved
in the following formats: PDF, XLS, CSV, HTML or RTF. Simply select the desired export format and
specify where the report should be saved. The figure below shows the Export format options.
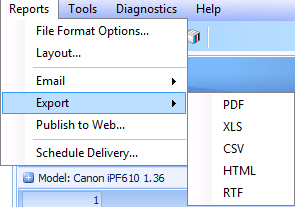
Figure 22: Reports Export Options
Saving a Custom View
In
SiteAudit 4.0 and later it is possible to save customized views, which can
then be published to the SiteAudit Reporting Web site, scheduled to be archived
or delivered via email. Once a view has
been configured as desired, select the File > Save or File > Save
As menu item and save the view.
Opening a Custom View
Saved
views can be opened and displayed in the SiteAudit Viewer by selecting Open
from the File menu and choosing the view to open or by selecting the
view name from the File > Recent
Views menu. When a view is in the SiteAudit Viewer, the view file
name and path are displayed at the top of the SiteAudit Viewer as shown in the
screenshot below. The view from name is
displayed above the company name with a diamond symbol to indicate that the
displayed view is a custom view.
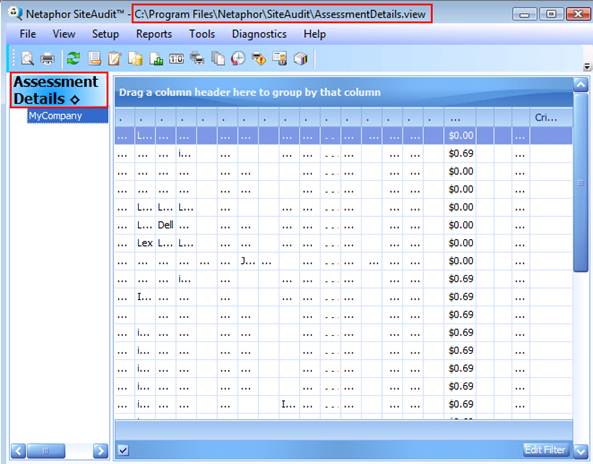
Figure 23: SiteAudit Viewer with Custom View Loaded

