Scheduling Reports in SiteAudit
This document describes how to schedule reports in Netaphor SiteAudit™. Any report created in SiteAudit can be scheduled for periodic archival and delivery to email recipients. Once a report is scheduled, no human intervention is required to create your monthly billing reports, weekly toner replacement reports, daily critical incident reports, etc.
Feature Overview
Netaphor SiteAudit™ contains eleven standard views and four diagnostic views. From these views, users can create virtually unlimited numbers of custom reports that contain precisely the data desired in a given format. Once a view is configured, it can be saved and scheduled for email delivery to recipients and/or archived to the file system using the Microsoft Windows© Task Scheduler. Each time the task executes, the report is generated dynamically. This ensures the report contains the most recent data collected from the printer fleet.
Things to Do Before Scheduling a Report
Scheduling reports in SiteAudit is a simple process. Here are the steps to complete prior to scheduling the report:
- Select the company or department for which you want to create a report.
- Select the appropriate time span for the report data.
- Choose the view that contains the data you want included in the report.
- Customize the view to display the desired data.
- Customize the report layout, header, footer, color, etc.
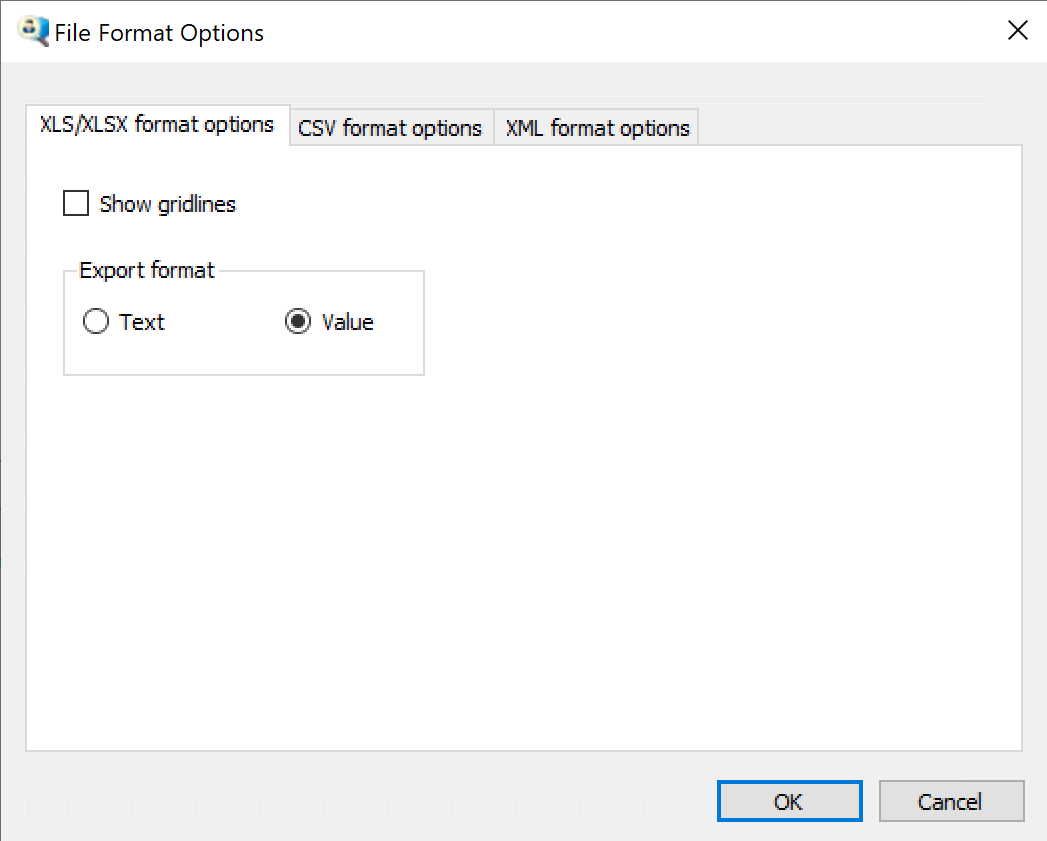
- Edit the File Format Options for XLSX or CSV reports
- Configure the scheduled delivery options.
- Save the report. (All view customizations, layout and scheduled delivery options are stored in the report).
- Ensure the SMTP server is configured if email delivery is desired.
Once the above has been completed, use the Windows Task Scheduler to schedule how often and when the report is to be generated. For example, to create a monthly report for billing, use the Volume Analysis view and set the time span for "This month." Then the report can be scheduled to run on the last day of the month. This will generate a report showing the volume printed for the entire month. Note: Sample reports of this type are included for free with your SiteAudit installation.
When scheduling Excel, fields that have a predefined list of items, such as Managed Status or Retired Status are displayed as integers. To show the Text values, modify the File Format Options prior to saving your report.
Note: The machine on which the scheduled report tasks reside MUST remain powered on, logged in and have access to the SMTP server.
Scheduling Delivery Options
A task can be created to generate any SiteAudit report and archive it or send it to email recipients. In order for this to succeed, the report must contain the delivery options.
The scheduled report delivery options are configured in the Delivery Options dialogue. This dialog can be opened by clicking the Reports > Schedule Delivery menu item.
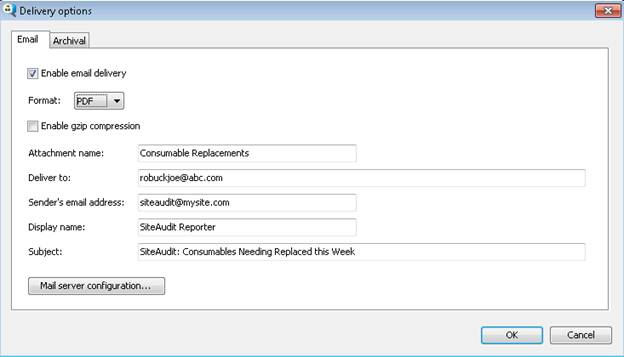
Figure 1: Deliver Options Dialog
The Schedule Delivery dialog contains a tab for configuring email options and one for configuring the desired archival options. The following sections explain how to configure these options.
Scheduling Email Delivery Options
SiteAudit reports are emailed to specified recipients whenever the Windows Task Scheduler task is executed. Reports are included as attachments to the email. This section describes how to configure the email options.
To enable email delivery of a report, check the Enable email delivery checkbox and configure the rest of the email options. Each field in this dialog is explained in detail below.
Figure 2: Email Delivery Options
Also see Mail Server Configuration & Testing at the end of this document.
- Format: Reports can be emailed in one of the following formats: PDF, XML, HTML, RTF, XLS or CSV. If an XSL stylesheet or filter document is specified in the File Format Options dialog, then this option MUST be set to XML.
-
Enable File Compression: Many SMTP servers do not allow users to send email with sizes exceeding 5 or 10MB. SiteAudit allows reports to be compressed and attached to a report by checking the Enable gzip compression checkbox. The report file extension is gz.
- Attachment Name: All scheduled reports are delivered as email attachments. Enter a name for the attachment in the Attachment name textbox. For example, suppose the attachment name is ABC and the desired report format selected was PDF. The email attachment name will be ABC.pdf. If gzip compression is enabled, the report file name would be ABC.gz. It is required to enter data in this field.
-
Deliver To: Enter the email recipients in the Deliver to textbox. Each email recipient address must be separated by a comma or semi-colon.It is required to fill out this data.
- Sender’s Email Address: Enter the address of the email sender. This address will appear in the FROM portion of the delivered email and must be any validly constructed email address. It is required to fill out this data.
- Display Name: Enter the email sender’s display name in the Display name textbox. For example, suppose a user enters the sender’s email address as "abc.com" and enters the display name "siteaudit." The email will appear to have come from siteaudit [abc.com].
- Subject: The text entered into this field is displayed in the Subject line of the email. This allows the recipient to quickly identify the content of the report. If no data is entered into this textbox, the email will contain the default subject: Netaphor SiteAudit™ usage, counts and consumables.
Scheduling Archive Delivery Options
SiteAudit reports can be archived to a storage location periodically using the Windows Task Scheduler. When the Task Scheduler task is invoked, SiteAudit generates and archives the report as defined in the Mail Server Configuration dialog.
To allow reports to be archived, check the Enable archival checkbox. If this checkbox is not selected, reports will not be archived.

Figure 3: Archival Delivery Options
-
Format: Reports can be archived in one of the following formats: PDF, XML, HTML, RTF, XLS or CSV. Select the desired file format for the report.
- Enable File Compression: Check the Enable gzip compression checkbox to compress the report. When this option is selected, a report is compressed when it is archived. The report file extension is gz and users must uncompress the file to view the report. Compressing a report is useful to conserve disk space.
- Archival Folder: Enter or select the folder where you want your schedule reports archived. This field is required.
- Archival Template: The archival template allows users to define the file name of their report and include a date/time stamp. Each time a report is generated, the file name will be appended with the current date and time.
The following MSDN article contains other date-time formats that can be used in the template: http://msdn.microsoft.com/en-us/library/8kb3ddd4.aspx
Delivery Option Considerations
It is important to confirm that a report can be successfully archived or emailed. The following notes explain how to confirm that report archival/emailing succeeds.
If a report is to be archived:
- The archival location specified in the report must exist.
- The computer where the task runs must have access to the specified archival folder and permitted to write to it.
If a report is to be emailed:
- The email delivery options must be specified in the report and must be accurate.
- The SMTP server must be accessible from the computer running the task.
- SiteAudit must be permitted to send email via the SMTP server.
Mail Server Configuration & Testing
The SMTP server must be specified in the Mail Server Configuration dialog (Figure 4) and SiteAudit must be able to send email through this server prior to scheduling reports for email delivery. This section explains how to confirm that SiteAudit can send email.
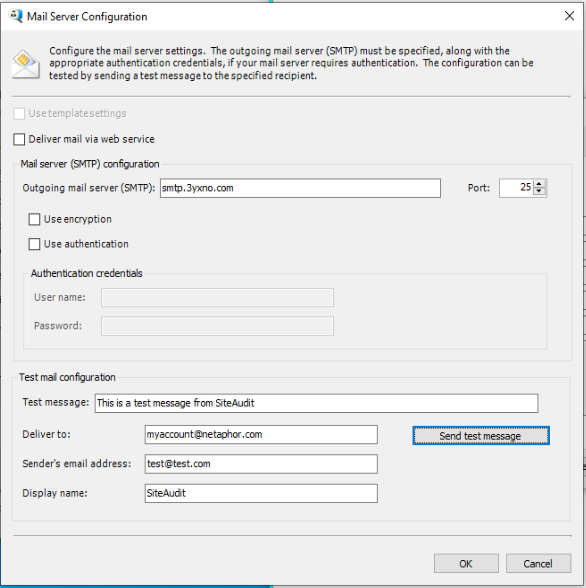
Figure 4: Mail Server Configuration Dialog
Specify the SMTP server, port and credentials if authentication is required. Once this information is specified, use the Test mail configuration section to confirm that SiteAudit can send email.
- Enter the email address that the test email should be sent to in the Deliver to textbox.
- Enter any validly constructed email address for the Sender’s email address and any Display name.
- Click the Send test message button and confirm the email was delivered to the specified address. If it was not, confirm that the SMTP server information entered is correct.
Click the Send test message from monitoring service button and confirm that the email is delivered to the specified recipient. The SiteAudit monitoring service must be running for this button to appear.
A task must be created to periodically email and/or archive SiteAudit reports. Refer to Using Windows Task Scheduler article to configure the task.


