

Sign in to print or save this article
Printing and saving articles is available to signed-in users. Sign in at http://netaphor.com/support/signin, or request an account at http://netaphor.com/support/request-access.
AA-01451 · http://netaphor.com/kb/AA-01451/customizing-views-in-the-siteaudit-viewer
Customizing Views in the SiteAudit Viewer
On this page
Every view in the SiteAudit Viewer (Inventory, Consumables, Problem Analysis, Volume Analysis, Incident History, Lifetime Counters, and the others on the View menu and toolbar) shows its data in a grid. You can change that grid to show exactly what you need: add or remove columns, change their order and width, sort, group, and filter. The Viewer remembers the changes, and you can save a customized view as a .view file to reopen, schedule, or share.
Before you begin
- Pick the right view. Each view offers its own set of columns. Columns common to all views, such as Manufacturer, Model, IP Address, and Serial #, are available everywhere; view-specific columns (for example, consumable levels or critical errors) are only in the view that collects them. If you plan a report, list the columns you need first, then choose the view that has them. See SiteAudit Viewer Field Column Definitions.
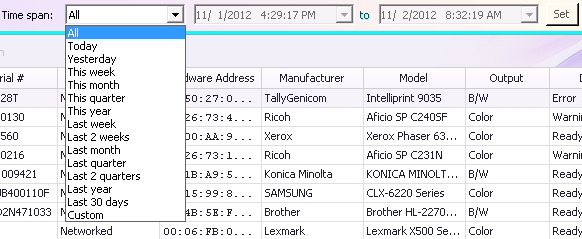
- Set the time span. The time span on the toolbar controls which period of data the view shows. A shorter time span also makes large views faster to load.
- Inactive printers are hidden by default. If a printer you expect is missing, check Setup > Display Configuration. When Only show active printers is selected, inactive printers are hidden from every view.
The column header menu
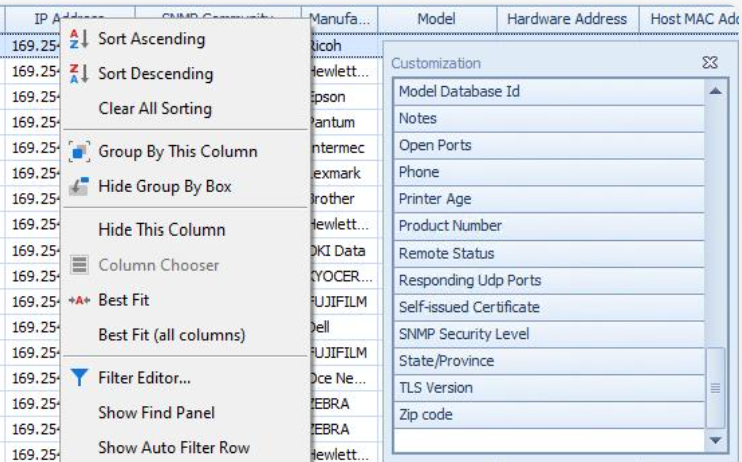
Most customizations start by right-clicking a column header. The menu applies to the column you right-clicked.
| Menu command | What it does |
|---|---|
| Sort Ascending / Sort Descending | Sorts the view by this column. |
| Clear All Sorting | Removes sorting from every column. |
| Group By This Column | Groups the rows by this column's values. |
| Hide Group By Box | Hides the Group By box above the column headers. |
| Hide This Column | Removes this column from the view. |
| Column Chooser | Opens the list of columns you can add. It's unavailable while the Column Chooser is already open. |
| Best Fit | Sizes this column to fit its contents. |
| Best Fit (all columns) | Sizes every column to fit its contents. |
| Filter Editor... | Opens the filter editor to build a filter across one or more columns. |
| Show Find Panel | Shows a search box above the grid for finding text in the view. |
| Show Auto Filter Row | Shows a row under the column headers where you can type a filter value for each column. |
Add columns with the Column Chooser
Each view shows a standard set of columns. Many more are available but hidden.
- Right-click any column header and select Column Chooser.
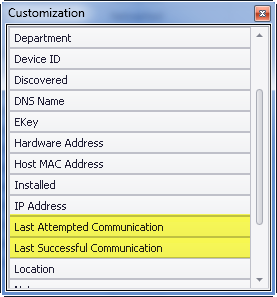
The Customization window opens and lists the columns for this view that aren't already shown.
- Add a column in either of these ways:
- Double-click the column name to add it to the grid.
- Drag the column name to the column header area and drop it where you want it. Arrows mark the position where the column will be placed.
- Repeat for any other columns you want.
- Close the Customization window by clicking the X in its top-right corner.
Remove columns
Removing a column only hides it in this view. No data is deleted, and you can add it back at any time from the Column Chooser.
- Right-click the column header and select Hide This Column, or
- With the Column Chooser open, drag the column header from the grid into the Customization window, or
- Drag the column header down off the header row into the grid area and drop it.
Reorder and resize columns
- Move a column: Drag its header left or right to a new position in the header row and drop it.
- Change a column's width: Drag the right edge of its header.
- Fit columns to their contents: Right-click a header and select Best Fit for that column, or Best Fit (all columns) for every column in the view.
Sort data
- Click a column header to sort the view by that column. Click the same header again to reverse the order. An arrow in the header shows the current sort direction.
- You can also right-click a header and select Sort Ascending or Sort Descending.
- To sort by more than one column, sort by the first column, then hold Shift and click the header of the next column.
- To remove all sorting, right-click any header and select Clear All Sorting.
Group data
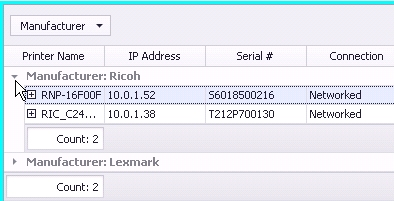
Grouping collects rows that share a value and shows how many rows are in each group. For example, grouping the Inventory view by Manufacturer shows how many printers you have from each manufacturer.
- Drag a column header (for example, Manufacturer) to the Group By box above the column headers. You can also right-click the header and select Group By This Column.

The grid now shows one row per manufacturer with the number of printers in each.
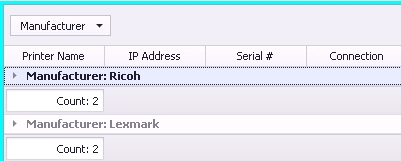
- Expand a group to see the individual printers in it.
- To group by more than one level, drag another header to the Group By box. For example, group by Output and then by Manufacturer to see color and monochrome printers, each broken down by manufacturer.
- You can still sort within groups: click a column header to sort the rows inside each group.
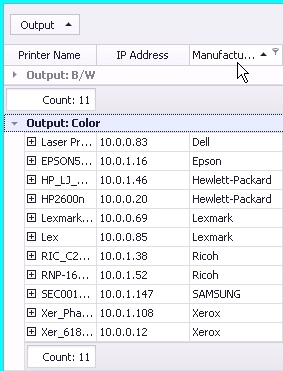
- To remove a grouping, drag the header from the Group By box back to the column header row.
To hide the Group By box when you don't need it, right-click a header and select Hide Group By Box. Use the same menu to show it again.
Filter data
Filters limit the view to the rows that meet your conditions, such as only certain manufacturers or only printers with more than a day of downtime.
Filter a single column
- Move the pointer over the column header until a funnel icon appears.
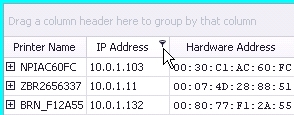
- Click the funnel, then either:
- Select a value from the list to show only rows with that value, or
- Select (Custom) to open the Custom AutoFilter dialog.
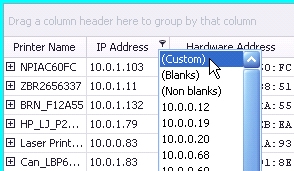
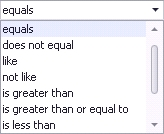
- In Custom AutoFilter, enter one or two conditions, such as equals, does not equal, is greater than, or is less than, and click OK.
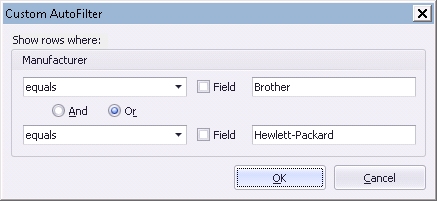
For example, filter the Manufacturer column to show rows where the value equals Brother or equals Hewlett-Packard.
For quick filtering on several columns, right-click a header and select Show Auto Filter Row, then type a value in the row under each column header you want to filter. To search for text anywhere in the view, select Show Find Panel.
Build a filter across several columns
Use the filter editor for conditions that combine columns.
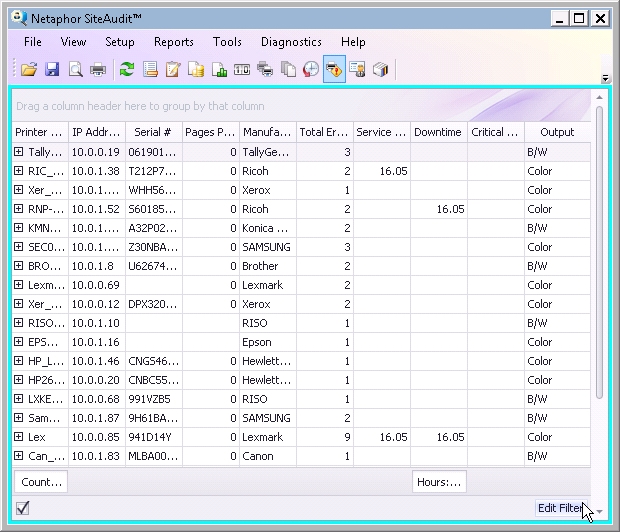
- Click Edit Filter at the bottom right of the grid, or right-click a column header and select Filter Editor....
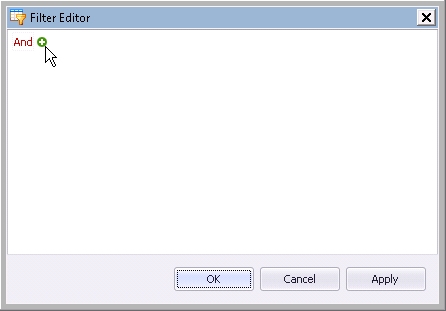
- Click the plus sign to add a condition.
- Click the column name in the condition and choose the column to test.
- Click the operator (for example, Equals) and choose a different one if needed, such as Is greater than or equal to.
- Click <Enter a value> and type the value.
- Add more conditions with the plus sign. To combine conditions differently, click And to change it to Or, or to add a group of conditions. For example, one Or group can list several manufacturers while an And joins that group to a downtime condition.
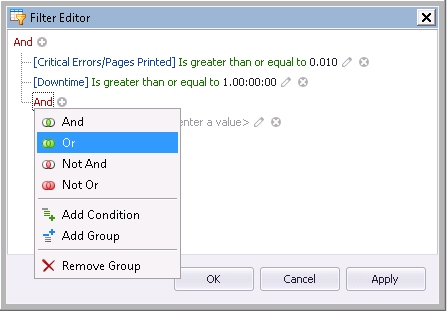
- Click OK to apply the filter.
For a worked example, see Filtering Data for Analysis. For date conditions, see Understanding the Date and Time Operators.
Reuse, change, or clear a filter
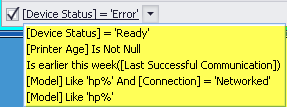
- The Viewer keeps the filters you have used with each view. Click the arrow at the bottom left of the grid and select a filter to apply it again.
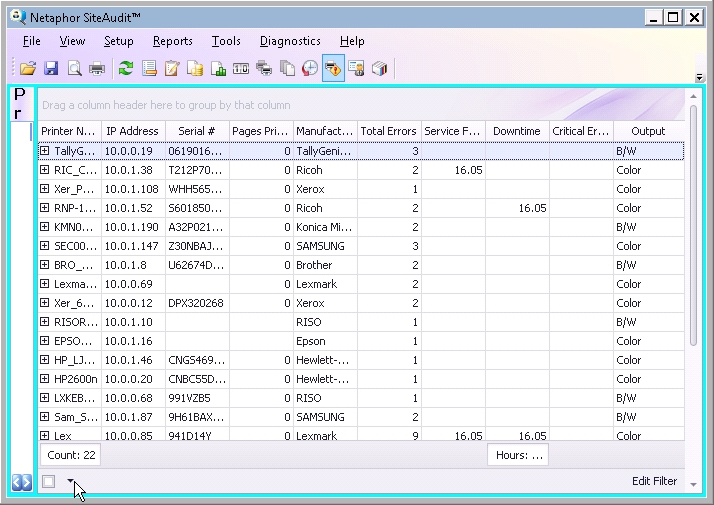
- To change the current filter, click Edit Filter and edit its conditions.
- To turn off the current filter, use the controls in the filter bar at the bottom of the grid: clear the check box to disable the filter temporarily, or click the X to remove it.
Save your customized view
The Viewer automatically remembers the last state of each view you open (its columns, sort, grouping, and filters), so the view looks the same the next time you open it on the same computer. These settings are stored per Windows user in:
C:\Users\<username>\AppData\Roaming\Netaphor\SiteAudit\defaultviews
To keep a customized view as a separate report you can reopen, schedule, or give to someone else:
- On the File menu, click Save As.
- Enter a descriptive name (for example,
HighUseSuppliesReport.view) and save it in a folder you can find again. - To open it later, select File > Open and select the
.viewfile. After changing an opened view, select File > Save to update it.
A saved .view file is also the template for scheduled reports. See Scheduling Reports in SiteAudit.
Reset views to their defaults
To return all views to the way they were when the Viewer was installed, select View > Reset Views.
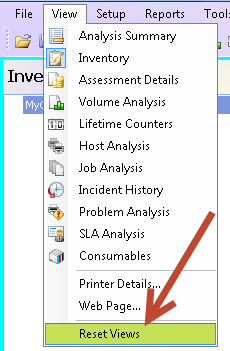
Important: Reset Views affects every view, and all customizations and stored filters are permanently removed.
To keep some of them, close the Viewer and rename the defaultviews folder before you reset. After the reset, SiteAudit creates a new defaultviews folder, and you can copy the .view files you want to keep back into it. Files you saved with File > Save As elsewhere are not affected. See Resetting Views.
New columns missing after an upgrade? An upgrade can add new columns to existing views that don't appear in the view or the Column Chooser. Select View > Reset Views to make them available. See New Columns Don't Appear.
Related articles
- Filtering Data for Analysis
- SiteAudit Viewer Field Column Definitions
- Resetting Views
- Scheduling Reports in SiteAudit