

Sign in to print or save this article
Printing and saving articles is available to signed-in users. Sign in at http://netaphor.com/support/signin, or request an account at http://netaphor.com/support/request-access.
AA-01430 · http://netaphor.com/kb/AA-01430/guide-to-siteaudit-8-5-web-reports
Guide to SiteAudit 8.5 Web Reports
On this page
- Overview
- Who Should Use This Guide?
- 1. Hosted and OnSite Deployments
- Hosted deployments
- OnSite deployments
- 2. OnSite Licensing
- 3. OnSite Service Requirements
- SQL Server Authentication
- Windows Authentication
- 4. Accessing Web Reports
- Hosted access
- OnSite access
- 5. Signing In
- 6. Understanding the Web Reports Dashboard
- Predefined templates
- Finding templates
- 7. Selecting Customers
- Hosted environments
- OnSite environments
- 8. Choosing Report Fields
- Inventory fields
- Lifetime Counter fields
- Consumables fields
- Incident fields
- Important limitation
- 9. Creating a Custom Template
- 10. Managing Custom Templates
- 11. Generating a Report
- 12. Exporting Report Results
- 13. Checking the Installed Version
- 14. Do Users Still Need SiteAudit Viewer or Control Panel?
- 15. Troubleshooting
- The Web Reports page does not open
- A browser security warning appears
- Sign-in fails
- No customers appear
- The Reporting Local Service cannot access SQL Server
- The report contains unexpectedly repeated rows
- A template cannot be edited
- Another user cannot see a custom template
- 16. Information to Include When Contacting Support
Overview
SiteAudit 8.5 introduces Web Reports, a browser-based reporting experience for retrieving and exporting information from one or more SiteAudit customer databases.
Web Reports replaces the Reporting WebSite included with SiteAudit versions 8.1.2.4 and earlier. It brings customer selection, template design, report-field selection, browser-based results, and export options together in a single workflow.
Depending on your deployment and permissions, you can use Web Reports to:
· Generate a report for one customer or multiple customers.
· Run a single report across your entire customer base.
· Combine Inventory and Lifetime Counter information with either Consumables or Incidents.
· View report results directly in a browser.
· Export report results as CSV or XLSX files.
· Save custom report templates for future use.
Web Reports does not require the SiteAudit Viewer or Control Panel to be installed on the report user’s computer.
Who Should Use This Guide?
This guide applies to:
· Hosted administrators, who manage access to customer databases and reporting users.
· OnSite administrators, who install, license, and configure Web Reports within their own environment.
· Report users, who select customers, create report templates, generate reports, and export results.
1. Hosted and OnSite Deployments
Web Reports supports both SiteAudit Hosted and SiteAudit OnSite environments.
Hosted deployments
Web Reports is available to SiteAudit Hosted customers and normally requires no local installation or service configuration.
Hosted users may have access to multiple customer databases. When creating a report, they can select one or more customers before choosing report fields.
Access is controlled through the user’s SiteAudit account and Microsoft Entra ID authentication.
OnSite deployments
SiteAudit OnSite customers run Web Reports on a server or workstation within their own environment.
OnSite users normally work with a single SiteAudit customer database. The customer is selected automatically when a report is created.
OnSite deployments require:
· A Web Reports license.
· The Web Reports application and Reporting Local Service.
· The .NET 10 Framework.
· Network access to the SiteAudit SQL Server database.
Appropriate SQL Server authentication and database permissions.
2. OnSite Licensing
Before Web Reports can be used with SiteAudit OnSite, the SiteAudit installation must be licensed for the Web Reports feature.
To request a license:
- Open SiteAudit Viewer.
- Select Help > About.
- Locate the SiteAudit Viewer User ID.
- Copy the User ID into an email.
- Send the request to your SiteAudit administrator or authorized Netaphor representative.
After the license is applied, restart the applicable SiteAudit services or applications if instructed by your administrator.
3. OnSite Service Requirements
The Netaphor SiteAudit™ Reporting Local Service is created when Web Reports is installed.
The Windows Log On As account used by this service depends on how the service connects to the SiteAudit SQL Server database.
SQL Server Authentication
When Web Reports connects to SQL Server using SQL Server Authentication, the Reporting Local Service should normally use:
Local System
This is the default and preferred configuration for SQL Server Authentication.
Example: Reporting Local Service configured for SQL Server Authentication

Windows Authentication
When Web Reports connects to SQL Server using Windows Authentication, the Reporting Local Service must run under a Windows user or service account that has appropriate access to the SiteAudit database.
The account should:
· Be recognized by the SQL Server.
· Have permission to connect to the SiteAudit database.
· Have the required database-owner access, typically the db_owner database role.
· Be configured as the Log On As account for the Netaphor SiteAudit Reporting Local Service.
Example: Reporting Local Service configured for Windows Authentication

Security recommendation: Use a dedicated service account whenever possible. Grant only the permissions required for Web Reports to operate.
After changing the service account, restart the Netaphor SiteAudit Reporting Local Service.
4. Accessing Web Reports
Web Reports is accessed through a supported web browser.
Hosted access
Hosted users access Web Reports from their SiteAudit Management Server.
For example, if the Management Server is:
netaphorabc.com
the Web Reports address is:
https://netaphorabc.com/reportingserver
Your actual address may differ. Contact your SiteAudit administrator if you do not know the correct URL.
OnSite access
By default, OnSite Web Reports uses HTTPS on port 2850.
From the computer where Web Reports is installed, use:
https://localhost:2850
From another computer on the same network, use either:
https://<machinename>:2850
or:
https://<ipaddress>:2850
Replace <machinename> or <ipaddress> with the name or IP address of the computer hosting Web Reports.
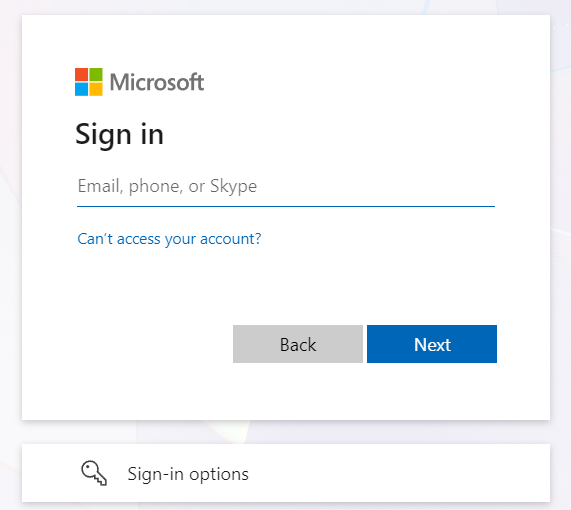
5. Signing In
To open Web Reports:
- Open the Web Reports URL for your environment.
- Review and accept any required warning, legal notice, or government-use disclaimer.
- Sign in using your authorized account.
- If Microsoft Entra ID single sign-on is enabled, authentication may occur automatically.
To end your session:
- Open the account menu.
- Select Sign Out.
Always sign out when using a shared computer.
6. Understanding the Web Reports Dashboard
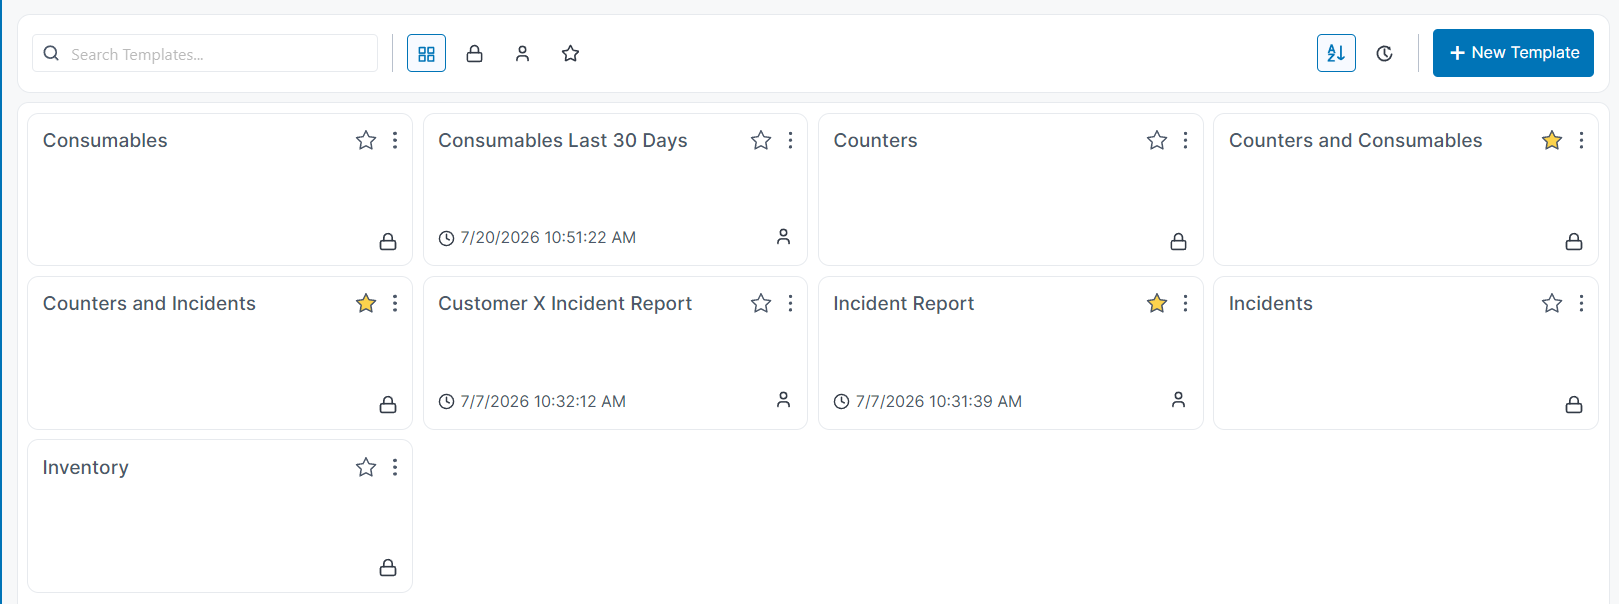
The dashboard displays the report templates available to your account.
Templates may include:
· Predefined SiteAudit templates.
· Custom templates that you created.
· Templates marked as favorites.
Predefined templates
Predefined templates display a lock icon.
Locked templates cannot be edited directly. To modify one:
- Locate the predefined template.
- Select Copy.
- Enter a name for the copied template.
- Edit the new private template.
You can also create a custom template from scratch.
Finding templates
Use the dashboard controls to:
· Search for a template by name.
· Sort the template list.
· Mark frequently used templates as favorites.
· Copy an existing template.
· Rename a custom template.
7. Selecting Customers
Customer selection differs between Hosted and OnSite deployments.
Hosted environments
Hosted users may be authorized to access multiple customer databases.
To select customers:
- Open or create a report template.
- Search for a customer by customer name or database name.
- Use filters to narrow the customer list.
- Select one or more customers.
- Continue to report-field selection.
Available filters may include:
· Billing type.
· Number of days monitored.
· Expiration date.
· Managed-device count.
· Customer name.
· Database name.
The customer view also includes a Column Chooser, which lets you control which customer details are displayed.
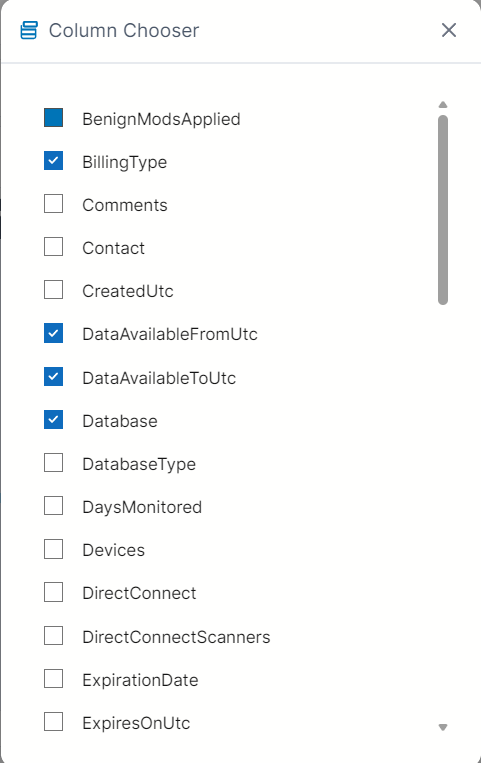
Depending on your version and permissions, the customer list can also be exported as:
· CSV
· XLSX
[Insert screenshot of customer selection and filtering]
OnSite environments
OnSite deployments contain a single customer database. That customer is selected automatically, so the customer-selection step may not appear.
8. Choosing Report Fields
Web Reports lets you combine information from several SiteAudit data categories.
Inventory fields
Inventory fields describe the device and its configuration. Examples include:
· Device type.
· Manufacturer and model.
· Firmware.
· IP address.
· Department.
· Managed status.
· Alert email address.
Lifetime Counter fields
Lifetime Counter fields contain cumulative page or usage counts. Examples include:
· Black-and-white count.
· Color count.
· Total count.
Consumables fields
Consumables fields describe toner, ink, drums, maintenance kits, and other supplies. Examples include:
· Consumable description.
· Consumable type.
· Current level.
· Estimated days remaining.
Incident fields
Incident fields describe alerts and device conditions. Examples include:
· Incident severity.
· Alert description.
· Incident or alert details.
Important limitation
A template can include:
· Inventory,
· Lifetime Counters, and
· Consumables
or
· Inventory,
· Lifetime Counters, and
· Incidents.
Do not include both Consumables and Incidents in the same template.
Combining both categories can create multiple matching records for each device. This multiplies the number of rows and can make report results difficult to understand.
9. Creating a Custom Template
To create a new template:
- From the dashboard, select the option to create a new template.
- Enter a descriptive template name.
- Select the applicable customer or customers.
- Choose the required report fields.
- Arrange or configure the fields as needed.
- Save the template.
- Select Generate to run the report.
Use template names that clearly identify the report’s purpose. For example:
· Monthly Fleet Inventory
· All Customers – Lifetime Counters
· Low Consumables by Customer
· Critical Device Incidents
10. Managing Custom Templates
Custom templates can be managed from the dashboard.
Depending on your permissions, you can:
· Rename a template.
· Copy a template.
· Search for a template.
· Sort the template list.
· Add or remove a template from favorites.
In SiteAudit 8.5.0.0, custom templates are private to the user who created them. They cannot be shared directly with other users.
To provide another user with a similar report, that user must create or copy a template under their own account.
11. Generating a Report
After selecting customers and report fields:
- Save the template if required.
- Select Generate.
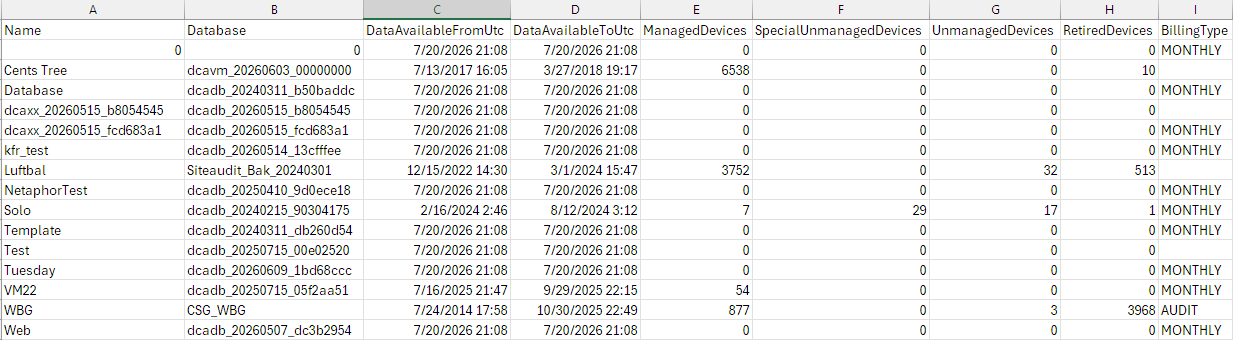
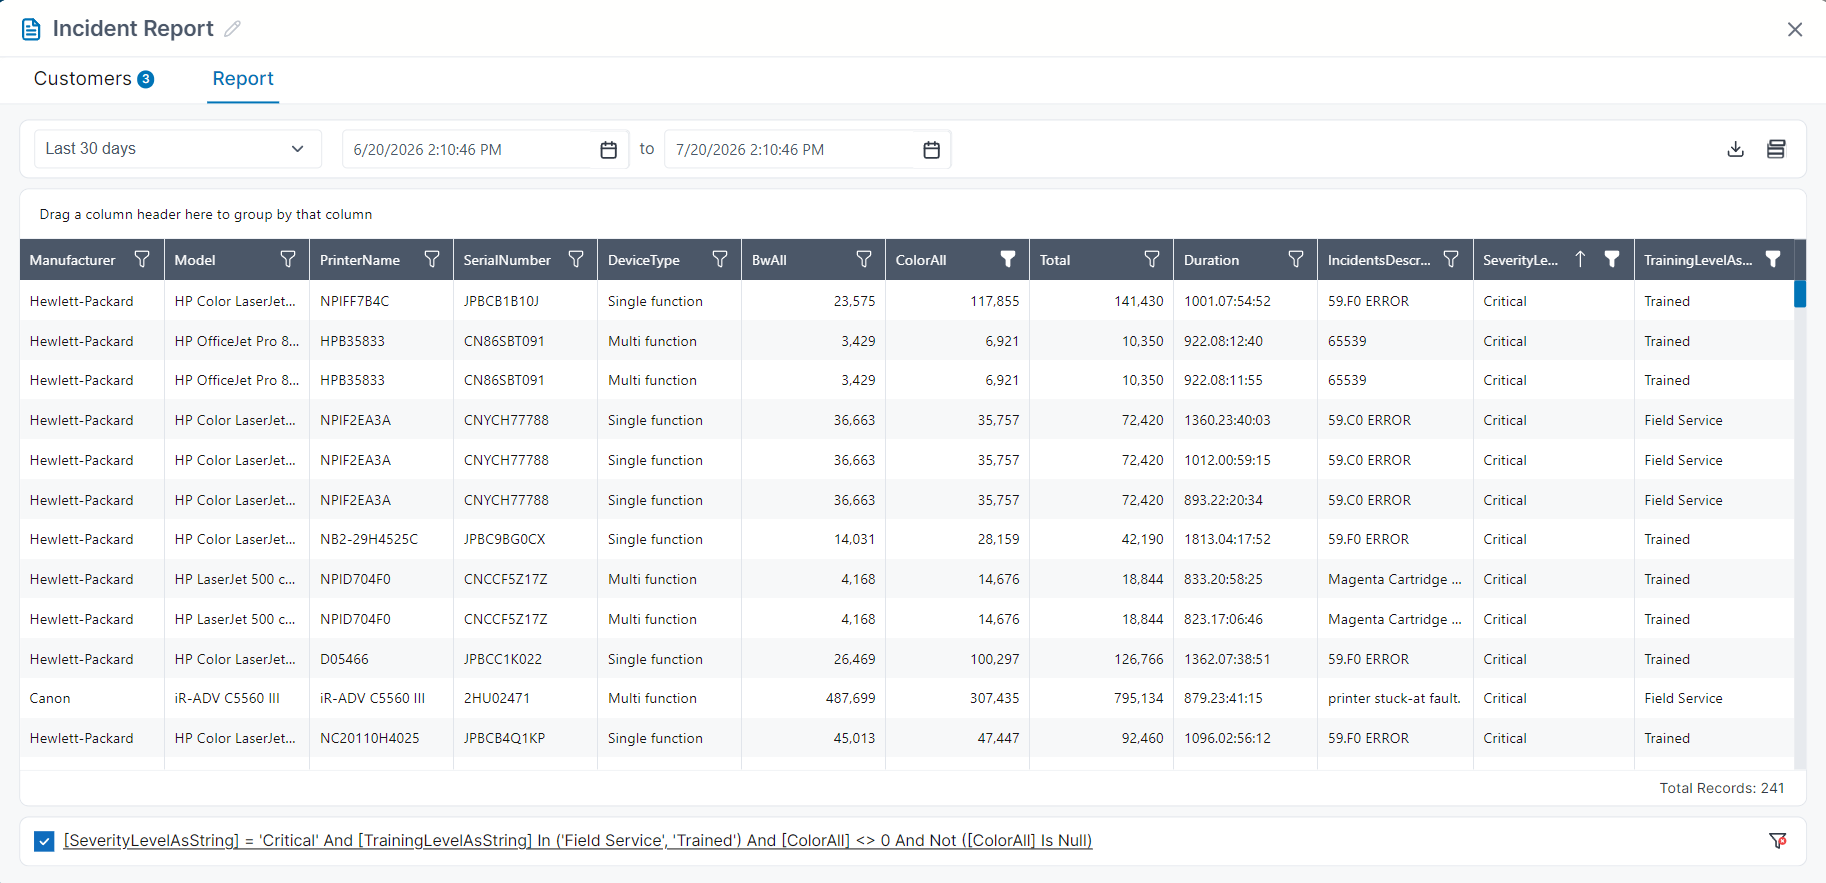
- Wait for the results to appear in the browser.
The time required depends on:
· The number of customers selected.
· The number of devices in each database.
· The report fields included.
· Network and database performance.
· Whether Consumables or Incidents are included.
When the results appear, select a column heading to sort the visible data.
**
12. Exporting Report Results
Web Reports can export report results in two formats:
· CSV, for simple data exchange and compatibility with a wide range of applications.
· XLSX, for use in Microsoft Excel and other spreadsheet applications.
To export a report:
- Generate the report.
- Review the results.
- Select Export.
- Choose CSV or XLSX.
- Save the downloaded file.
The exported file reflects the report fields and customer selections defined in the template.
**
13. Checking the Installed Version
Use the About section in Web Reports to:
· Confirm the installed Web Reports version.
· Review application information.
· Review third-party software licenses.
When contacting support, include the exact version shown in the About section.
Installers, prerequisites, and related downloads are available from the Netaphor Downloads page.
**
14. Do Users Still Need SiteAudit Viewer or Control Panel?
SiteAudit Viewer and SiteAudit Control Panel remain part of the SiteAudit product family.
However, users who only need to view data and run reports may no longer need either application installed on their computers. Web Reports provides browser-based access to reporting functions without requiring a local Viewer or Control Panel installation.
SiteAudit Viewer and Control Panel may still be required for administration, configuration, monitoring, or other features that are not included in Web Reports.
Web Reports users continue to be authenticated through Microsoft Entra ID and are restricted to customer content that their accounts are authorized to access.
**
15. Troubleshooting
The Web Reports page does not open
For an OnSite deployment, verify that:
· The URL uses https://.
· Port 2850 is included in the URL.
· The Netaphor SiteAudit Reporting Local Service is running.
· The computer name or IP address is correct.
· Port 2850 is allowed through the server and network firewalls.
· The client computer can resolve the Web Reports server name.
· The required .NET 10 Framework is installed.
Try opening the site locally on the Web Reports computer:
https://localhost:2850
If local access works but remote access does not, the issue is likely related to the firewall, DNS, certificate, or network configuration.
A browser security warning appears
A security warning may appear if the OnSite server uses a certificate that is self-signed, expired, untrusted, or does not match the server name in the URL.
Contact your OnSite administrator before continuing. The administrator may need to install or configure a trusted HTTPS certificate.
Sign-in fails
Verify that:
· You are using the correct account.
· Your account has access to Web Reports.
· Microsoft Entra ID authentication is functioning.
· Your account is authorized for the requested customer databases.
· The Hosted or OnSite server can communicate with the required identity services.
No customers appear
For Hosted deployments, confirm that the signed-in user has been granted access to at least one customer database.
For OnSite deployments, the single configured customer should be selected automatically.
The Reporting Local Service cannot access SQL Server
Verify that the service account matches the SQL Server authentication method.
For SQL Server Authentication:
· The service should normally run as Local System.
· Confirm that the configured SQL credentials are valid.
For Windows Authentication:
· Configure the service to use an authorized Windows user or service account.
· Confirm that the account can connect to SQL Server.
· Confirm that the account has the required database permissions.
· Restart the service after changing the account.
The report contains unexpectedly repeated rows
Check whether the template includes both Consumables and Incidents.
A report should include one of these categories, not both. Including both can multiply rows because a single device may have multiple consumables and multiple incidents.
A template cannot be edited
Predefined templates are locked and cannot be edited directly.
Copy the template, then edit the new private copy.
Another user cannot see a custom template
In SiteAudit 8.5.0.0, custom templates are private to their creator and cannot be shared between users.
**
16. Information to Include When Contacting Support
When requesting assistance, provide:
· Your SiteAudit deployment type: Hosted or OnSite.
· The Web Reports version shown in About.
· The URL being used.
· The exact error message.
· A screenshot of the issue.
· Whether the issue occurs for one user or multiple users.
· Whether the issue affects one customer or all customers.
· For OnSite environments, the Windows service status and authentication method.
· The approximate time the issue occurred.
Do not send passwords, SQL credentials, authentication tokens, or other sensitive information.
**
**
**
**
**
**