

Sign in to print or save this article
Printing and saving articles is available to signed-in users. Sign in at http://netaphor.com/support/signin, or request an account at http://netaphor.com/support/request-access.
AA-00734 · http://netaphor.com/kb/AA-00734/modifying-printer-labels-in-netaphor-siteaudit-visualizer
Modifying Printer Labels in Netaphor SiteAudit™ Visualizer
Default labels that appear next to printers in the Netaphor SiteAudit™ Visualize can be customized. This article explains how to modify the labels to display desired information.
How to Modify SiteAudit Visualizer Printer Labels
- Ensure that the developer menu is turned on. If not, visit Turning On the Developer Menu at the end of this article
- Right-click a shape and follow the Data menu
- Click Shape Data. This opens two columns of shape information on the right-hand side of the main window.
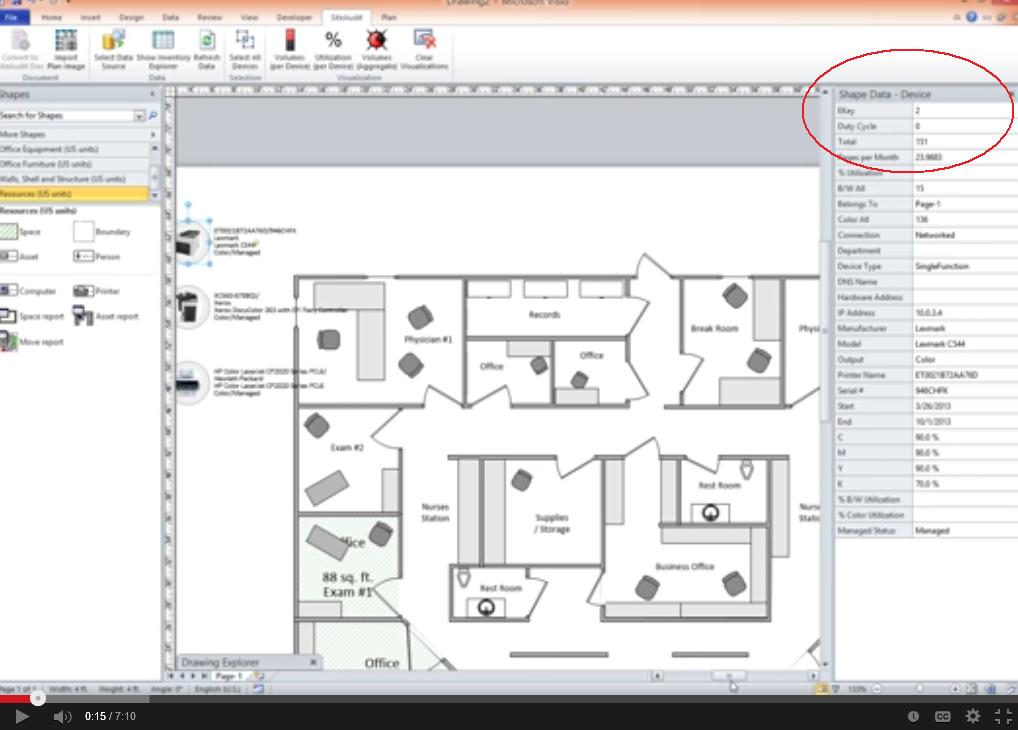
- The left column lists Field Labels. By right-clicking a shape and clicking "Data"->"Define Shape Data," the shapes' Internal Names are revealed in a column at the bottom of the Define Shape Data box, next to the "label" column. For instance, the Internal Name for DNS is "_visDM_DNS_Name". The Internal Names of Field Labels are used to create formulas.
- Next, right-click on a shape, and click Show ShapeSheet. A new window will open on the bottom half of your screen.
- Inside this new window, locate the line named user.text. It can be found under the User-Defined Cells column. This line contains the formula needed to create labels.
- To the right of each shape in the main window, you will find the following information:
- Printer name/serial number
- Manufacturer
- Model
- Output/managed status
- This information is created out of the internal names of field labels used to create label formulas, as seen in step five.
- In the label formula found in user.text, each particle of information is preceded by: Prop. Each line of text is put together using the concatenation: &"/"&. Each line feed is written out as: CHAR(10). To learn more about how these functions of the formula work, see Label Formulas Example.
- While each shape's formula can be edited individually, this is time-consuming. To edit multiple labels, follow the steps in the following section.
- How to Modify Multiple Shape Labels at Once
- Go to the Developer menu and enable Drawing Explorer.
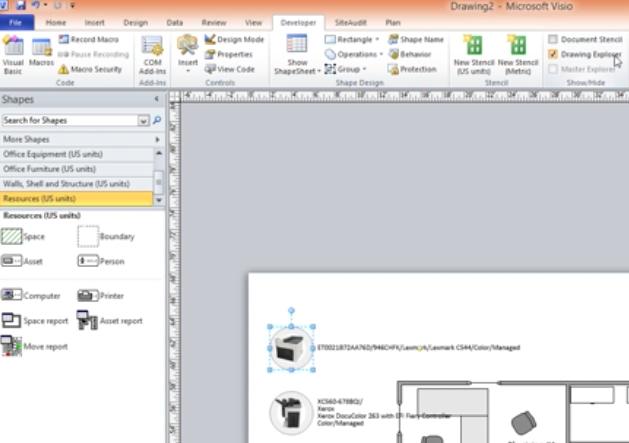
- Drawing Explorer is now available at the bottom-left corner of the main window.
- Click Drawing Explorer. From the window that opens, select Masters.
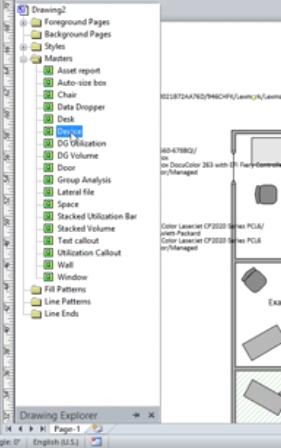
- Under Masters, you will find a shape called Device. This is the master shape that all other shapes are based on. When this shape is edited, all the other shapes on the page will inherit its features.
- Right-click on Device and select Edit Master Shape.
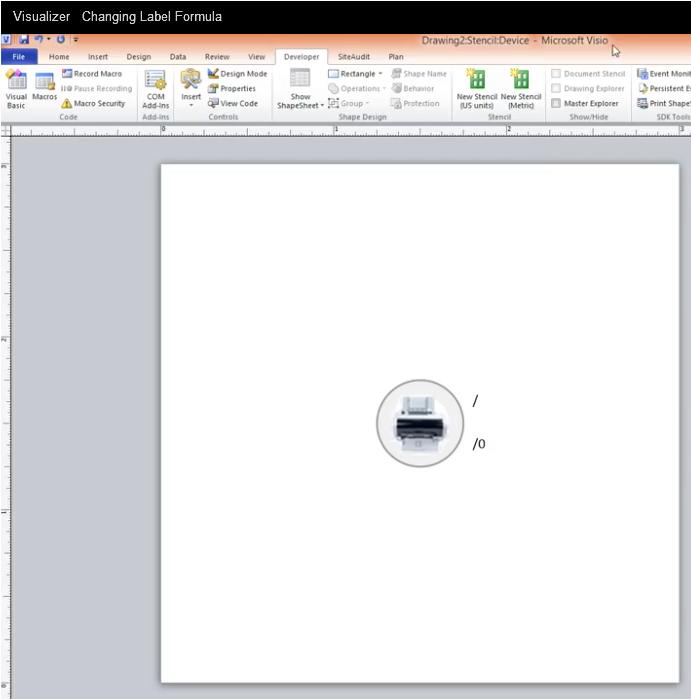
- The Master Shape
- The Master Shape will open in a new window. Right-click on this shape and click Show ShapeSheet.
- The master formula for all shapes on the screen can now be edited using the user.text field as described in steps five through seven under How to Modify Shape Labels in Visio Visualizer.
- When closing the master shape after changing the formula, you will be asked "Do you want to update the device and all of its instances?" Click yes. All shapes will be modified except those that have been individually modified previously.
- Label Formulas Example
- Here is an example of a label formula:
- =Prop.VisDM_Printer_Name&"/"&Prop._VisDM_Seria_&CHAR(10)&Prop._VisDM_Manufacturer&CHAR(10)&Prop._VisDM_Model&CHAR(10)&Prop._VisDM_Output&"/"&Prop._VisDM_Managed_Status
- Notice that each of the four pieces of information found in each shape (Printer name/serial number; Manufacturer; Model; Output/Managed status) is preceded by "Prop.".
- This formula works like an Excel formula: it puts together (concatenates) two text fields. The operator ampersand ("&") is the concatenation that adds the two text fields together.
- CHAR(10) stands for "line feed."
- To see how this works, try replacing all concatenations with line feeds.
- 1. Find and copy "&CHAR(10)&"
- 2. Now find and replace every instance of &"/"& with the line feed
- 3. Paste this back into the User.Text field under User-Defined cells. You will see that the concatenators have been replaced by line feeds in the main window to the right of the shape being defined
- Turning On the Developer Menu
- The developer menu isn't turned on by default in Visio. To enable it, go to: File -> Options -> Customize Ribbon.
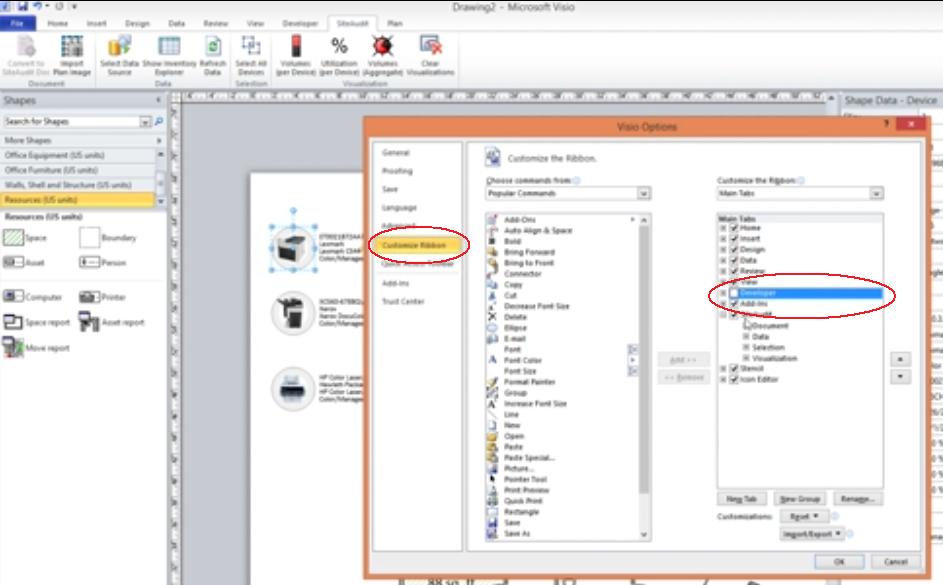
- Customize Ribbon
- In the far right column, be sure to check the Developer button (see photo). This will turn on additional menu items.