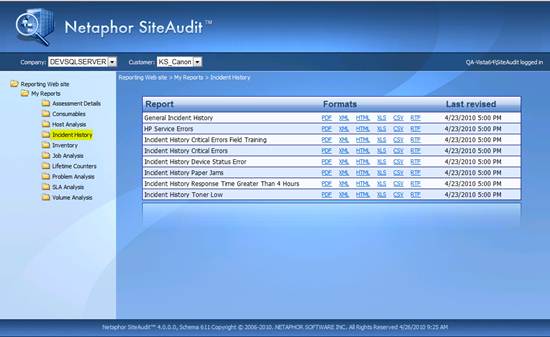
Netaphor SiteAudit offers the ability to create reports from any
SiteAudit view and publish the reports to a web site so that users can view
reports using a browser. This article
describes how to prepare for a Reporting Web site installation and how to troubleshoot
basic IIS issues related to the Reporting Web site.
Feature Overview
The Reporting Web site is a new feature available since SiteAudit 4.0 that allows users to obtain SiteAudit reports over the Intranet
or Internet. The Reporting Web site is
an ASPX site that runs on Microsoft IIS 6 or later. Authorized users can publish reports to the
Reporting Website directly from the SiteAudit Viewer and the reports can be
accessed over the Web using Internet Explorer 7 or later.
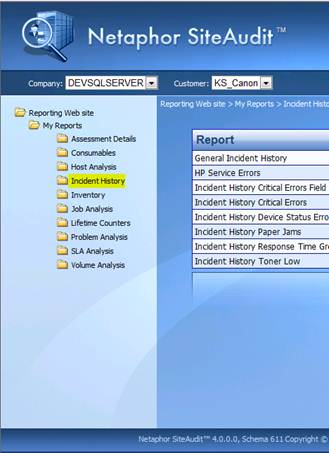
Figure 1 shows an example of the default Reporting Web site
installed with SiteAudit 4.0. Reports
can obtain data from different databases by configuring which database is
accessed by the Reporting Web site. When a report format is selected, the report is generated automatically and obtains the latest information stored in the SiteAudit database.
Figure 1 –Netaphor SiteAudit Reporting Website
Installing the Reporting Web Site
The Reporting Web site
is installed using the typical SiteAudit installer program but new options have
been added. The following information
describes the installation of the Reporting Web site component.
IIS
6 or later must be installed prior to installing the Reporting Web site. Otherwise, the component will be disabled in
the installer. Note that the Reporting Web site is not supported on Windows XP systems because it does not support the minimum IIS 6 requirement.
The
Reporting Web site requires a license upgrade that is free to customers who
have a current support contract. Contact
Netaphor Support for a new license for the Reporting Web site.
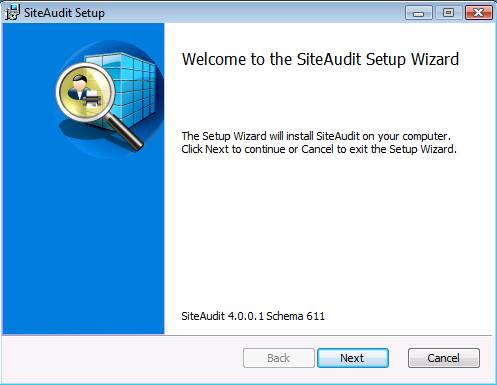
The
SiteAudit installation welcome is the first screen that appears when the
installer is launched. The SiteAudit
schema and version are displayed at the bottom of the panel. Click Next to continue.
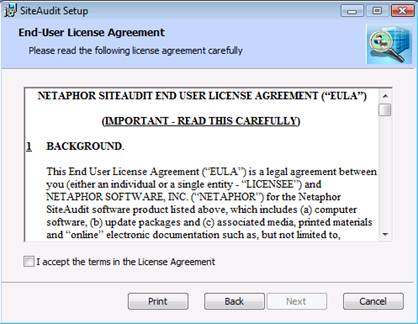
Users
must accept the End-User License Agreement in order to install any SiteAudit
component. Check the box to accept the
license agreement and click the Next
button to continue.
To
install the Reporting Web site, select the Access
Reports via a browser option. The View
and Setup Reports only option is selected automatically because the
SiteAudit Viewer is a required component when installing the Reporting Web
site. Click the Next button to continue.

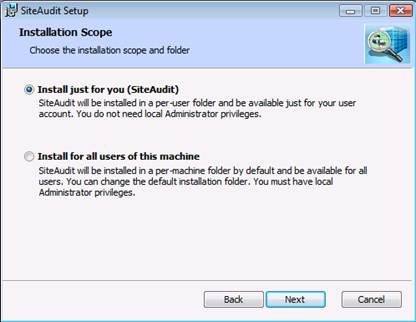
Choose
the installation scope option and click the Next
button to continue
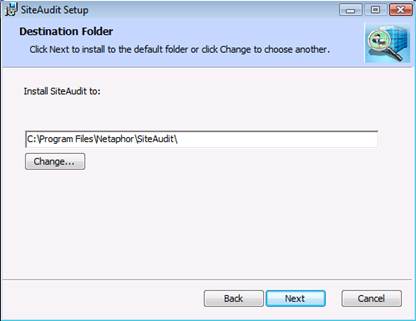
Click
the Next button to accept the default
SiteAudit installation folder or click the Change
button, select the installation folder and then click Next to continue.
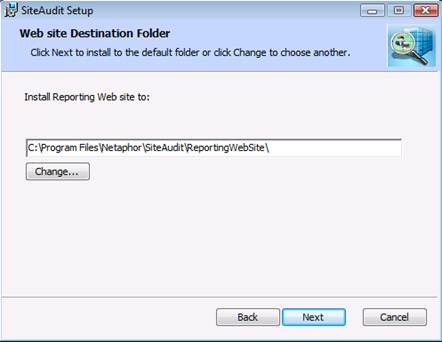
Click
the Next button to accept the default
Web site installation folder or click the Change
button, select the installation folder and then click Next to continue.
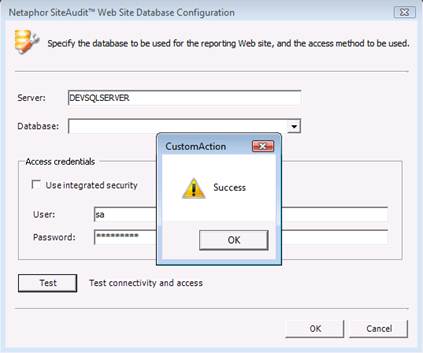
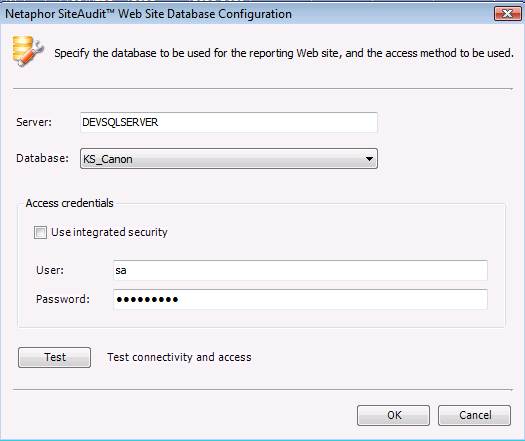
Enter
the SQL server name into the Server textbox.
If the SQL server contains instances, the instance name must be
specified. For example: DEVSQLSERVER\INSTANCE. Enter the credentials to access the SQL
server and click the Test button to
confirm the credentials are correct. A
“Success” dialog appears if the credentials are valid or an error message will
appear if they are not.
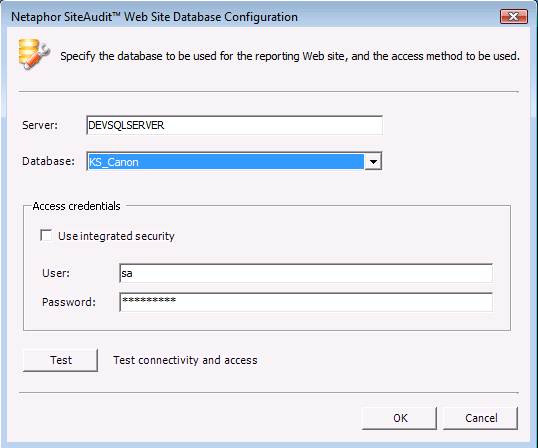
Select
the database that will be accessed from the Reporting Web site. Note that reports run from the Reporting Web
site will contain data from the selected database. The Web Site Database Configuration dialog
shown below is also accessible from within the SiteAudit Viewer. This allows users to choose different SQL
servers and databases.
Once
the database has been selected, click the OK
button to proceed.
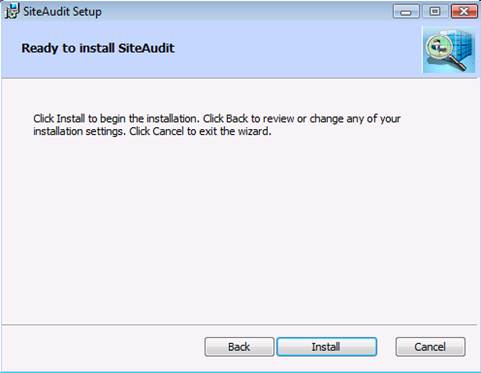
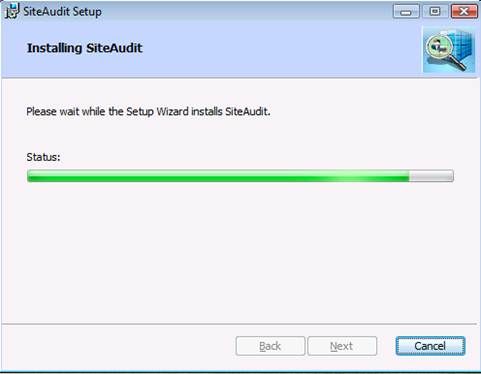
Click
the Install button to begin the
installation. Once the installation
begins, users may be required to elevate to administrator privileges.
Once
the installation has completed, read the license information and click the Next button to continue.
Click
Finish to complete the
installation setup process
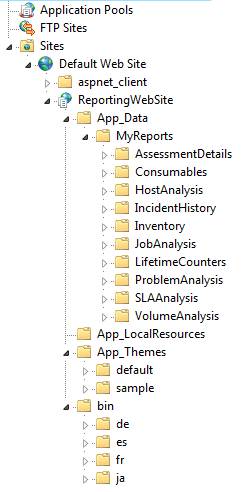
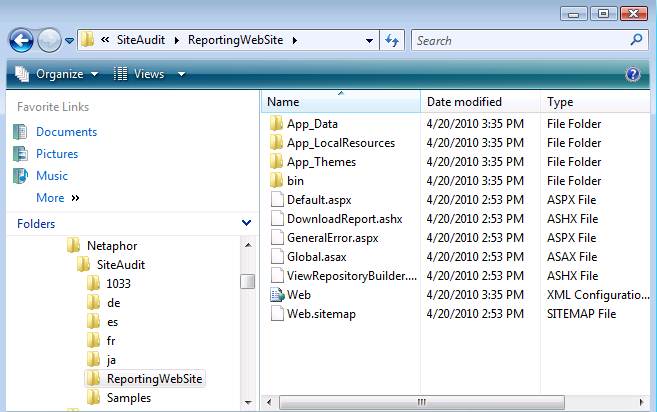
Reporting Web Site Installed Files
When the Reporting Web
site is installed, a virtual directory is created and IIS is configured to run
the application. The following
screenshot shows the files and folders installed for the Reporting Web site.
IIS Configuration
When the Reporting Web
site is installed, a virtual directory is created and IIS is configured to run
the application. The following
screenshot shows the files and folders installed on the Reporting Web site.
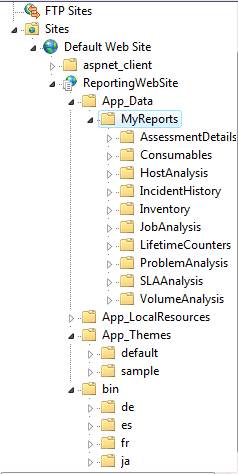
The App_Data folder contains the sample views that are automatically
installed and available on the Reporting Web site. The App_Theme
folder contains the default theme for the site.
Users can create their own themes and place them into this folder.
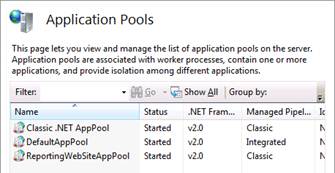
An application pool is automatically
created for the Reporting Web site to prevent conflicts with other web
applications.
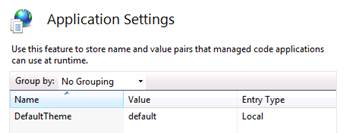
The following screenshot shows that the
default theme is being used for the
site. Users are permitted to create
their own themes. The theme used by the
Reporting Web site must be specified in the web.config file.
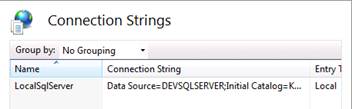
During installation, users are required
to enter the SQL server and database accessed by the Reporting Web site. The SQL connection string that was entered is
shown here. The connection string can be
modified from the SiteAudit Viewer using the Web Site Database Configuration
dialog.
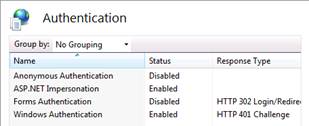
The following screenshot shows the
authentication settings for the Reporting Web site.
Managing the Report
Folders
The Reporting Web site folder structure shown below in the
left panel is defined in the Web.sitemap file located in the root of the
Reporting Web site installation folder.
This file is referred to as the sitemap file.
Note that the report folders shown in the browser have
spaces in their names, but the actual folders that exist in the virtual
directory do not contain spaces in the name.
The folder display names and URLs are defined in the Web.sitemap file
explained in the next section.
The actual folder
structure in the Web site application is shown below. Note that the folder structure appears the
same as it does in the browser; however, if you take a close look you will
notice that there are no spaces in the folder names in IIS. Spaces are not permitted in the actual folder
names, but the display name shown in the browser can have spaces or be named
entirely different than the folder name.
Securing
Reporting Web Site Folders
By default, all users who have access
to the Reporting Web site can see all folders and reports that exist. It is
possible to limit access to the Reporting Web site folders to specific users
and deny access to others. Folders are invisible to users who are denied access
to them and visible to those who are permitted access. The folder security is
handled in the web.config file located in the root folder of the Reporting Web
site.
There is a section in the web.config
called “location.” This is where the administrator can define the path
(the RWS folder) that requires special access privileges. A common
technique is to create groups and assign users to the specific groups. Then
allow or deny folder access to one or more groups. It is acceptable to allow or
deny folder access to individuals as well.
In the example below, only users in the
specified group will see the Inventory folder in the Reporting Web site.
It will be hidden for all other users. Additionally, one can define
specific users in the group who can access to the folder. An example user
is: domain/username
<location path="MyReports/Inventory">
<system.web>
<authorization>
<allow roles="RWSInventoryUsers" />
</authorization>
</system.web>
</location>
In the above example, the
RWSInventoryUsers group contains the list of users who are permitted to view
reports in the MyReports/Inventory folder.
The Inventory folder will be hidden for all users who are not a member
of the RWSInventoryUsers group.
This Microsoft KB article provides additional
details for securing website folders http://support.microsoft.com/kb/316871
Site Map Folder Specification
The sitemap identifies the folder structure and folder names
displayed on the Reporting Web site. The
following data is contained in the Web.sitemap
file installed in the root folder of the Reporting Web site.
<?xml
version="1.0" encoding="utf-8" ?>
<siteMap
xmlns="http://schemas.microsoft.com/AspNet/SiteMap-File-1.0" >
<siteMapNode url="Default.aspx" title="Reporting Web
site" description="The
Reporting Web site root folder" >
<siteMapNode url="MyReports/Default.aspx"
title="My Reports"
description="Contains sample reports" >
<siteMapNode url="MyReports/AssessmentDetails/Default.aspx"
title="Assessment Details"
description="Sample Assessment Detail reports" />
<siteMapNode url="MyReports/Consumables/Default.aspx"
title="Consumables"
description="Sample Consumables reports" />
<siteMapNode url="MyReports/HostAnalysis/Default.aspx"
title="Host Analysis"
description="Sample Host Analysis reports" />
<siteMapNode url="MyReports/IncidentHistory/Default.aspx"
title="Incident History"
description="Sample Incident History reports" />
<siteMapNode url="MyReports/Inventory/Default.aspx"
title="Inventory"
description="Sample Inventory reports" />
<siteMapNode url="MyReports/JobAnalysis/Default.aspx"
title="Job Analysis"
description="Sample Job Analysis reports" />
<siteMapNode url="MyReports/LifetimeCounters/Default.aspx"
title="Lifetime Counters"
description="Sample Lifetime Counters reports" />
<siteMapNode url="MyReports/ProblemAnalysis/Default.aspx"
title="Problem Analysis"
description="Sample Problem Analysis reports" />
<siteMapNode url="MyReports/SLAAnalysis/Default.aspx"
title="SLA Analysis"
description="Sample Service Level Agreement reports" />
<siteMapNode url="MyReports/VolumeAnalysis/Default.aspx"
title="Volume Analysis"
description="Sample Volume Analysis reports" />
</siteMapNode>
</siteMapNode>
</siteMap>
The installed sitemap contains several folder definitions
and SiteAudit installs sample views in each folder which can be opened from the
Reporting Web site. Users can publish
their own views to the Reporting Web site but may desire a new folder to place
the views. New folders can be defined in
the sitemap and the IIS administrator must create the actual folder in the
Reporting Web site virtual directory.
Once a folder has been created, users can publish as many views to the
folder as desired.
To create a folder in the sitemap, simply add additional
siteMapNode elements in the location where the new folder should exist. Three properties must be filled in for each
report folder node: url, title, and description. These are described below.
URL
The url property contains folder name and path, if the
folder is a child of other folders. All
url properties must end with the Default.aspx page. For example, suppose you want a folder at the
root named TEST. The url value for this
would be: TEST/Default.aspx. If you want
the TEST folder placed as a child of the Sample folder, the url value should
be: Sample/TEST/Default.aspx. It is
important to note that spaces are not allowed in the url property. When publishing a view to the Reporting Web
site, it must be published to the folder specified here. In this example, users should publish new
views to the Sample/TEST folder,
Title
The title property value contains the folder name that is
displayed in the browser. Titles are
permitted to contain spaces. Users can
enter any text for the title value however, it makes most sense to have the
title match the URL folder name as closely as possible.
Description
The description property allows the site administrator to
enter a description for the folder. This
description will be displayed as a tooltip when users hover over the folder
name on the Reporting Web site page.
Configuring
Users
All
users who access the Reporting Web site must be a member of the IIS_USR
group. It is possible that users can
access the site when not a member of this group but may be limited to certain
actions. Therefore it is recommended to
always enter users into the IIS_USR group.
Accessing Alternative SiteAudit Databases
During installation of the Reporting
Web site, users may enter the SQL server and database information. This information is known as the database
connection string. The database
connection string allows the Reporting Web site to access a SiteAudit database
to create reports.
It may be desirable to change which SQL
server or database is accessed. Regardless
which SQL server and database is selected, the folder structure on the
Reporting Web site does not change.
However, the content inside each report will change because the data is
obtained from a different database.
To access a different database, create
a new connection string using the Web
Site Database Configuration dialog launched from the SiteAudit Viewer Setup menu. This dialog is identical to what is presented
in the SiteAudit installer.
Change the SQL server, database, or
credentials as desired.
Troubleshooting
The following section contains some common issues
administrators may encounter when setting up the Reporting Web site.
Configure User Access
All
users who will access the Reporting Web site must be a member of the IIS_USR
group. It is possible that users can
access the site when not a member of this group but may be limited in what
actions are permissible. Therefore it is
recommended to always enter users into the IIS_USR group.
Access to Path Denied
If
the Access to path denied error occurs when viewing a report, enable Intranet
settings in Internet Explorer. This can
be done by disabling the property, Enable
protected mode, under the Advanced Internet Options.
Using Alternative Credentials
Internet
Explorer contains an advanced setting to always prompt users for credentials
even if the user is logged into the machine using a domain account. To disable the prompt for domain users,
disable Always Prompt in the advanced
settings. Domain users will not be
required to enter credentials when logging into the Reporting Web site.
It
may be the case that a different user must log onto the Reporting Web site from
a machine where a domain user has logged in.
Enable the Always Prompt
property so that the user can enter the appropriate credentials.