Create and modify Custom Fields with the SiteAudit Asset Tool
The SiteAudit Asset Tool Custom Fields tool allows the user
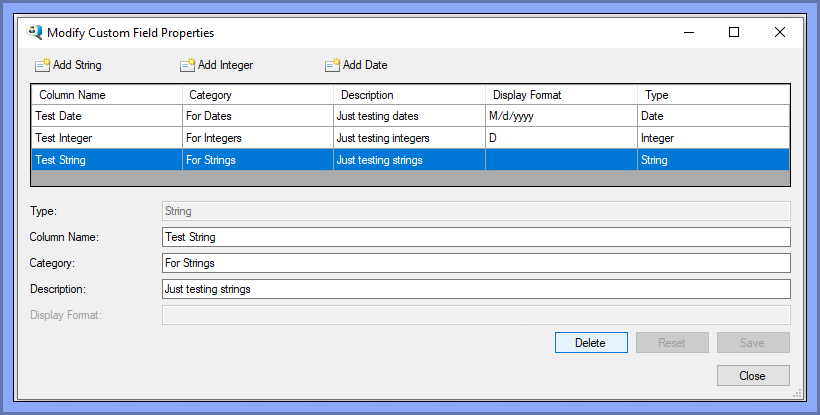
- Save: 15 custom fields
- 6 string fields
- 3 date fields
- 6 integer fields
- Reset
- Resets the text fields before the custom field is saved, once the field is saved, the field cannot be reset.
- Delete
For more information on Custom Fields: Custom Fields
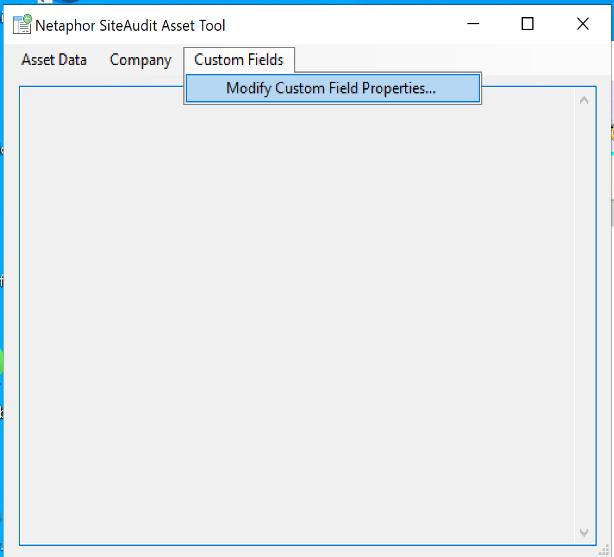
- Open the 'Netaphor SiteAudit Asset Tool'
- Click the button 'Custom Fields'
- Select 'Modify Custom Field Properties...' from the drop down menu
'Modify Custom Field Properties' window opens
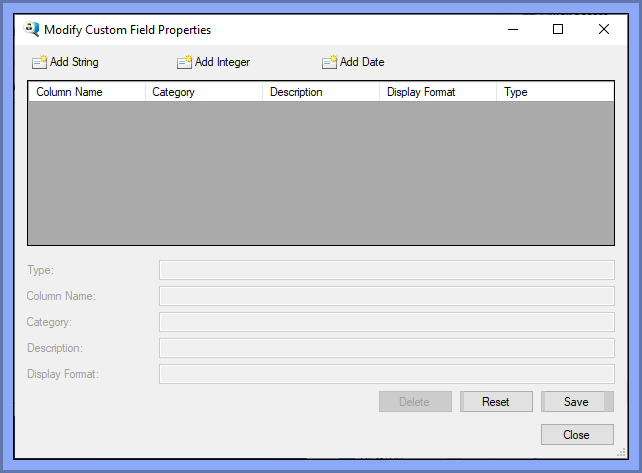
Add String
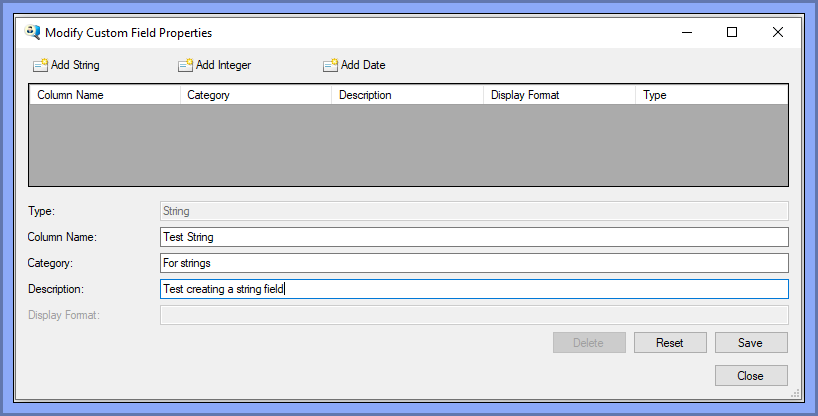
4.a. Click the button, 'Add String'
5.a. Fill in the fields:
- Column Name (Mandatory)
- Category
- Description
6.a. Click the button, 'Save'
A Custom Field String is added to SiteAudit
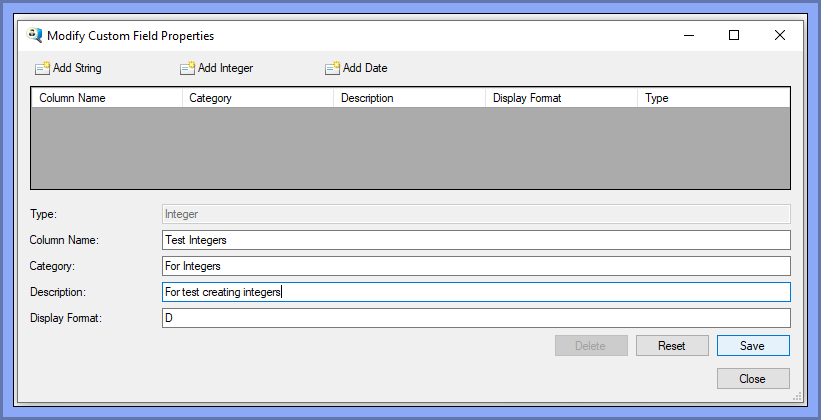
Add Integer
4.b. Click the button, 'Add Integer'
5.b. Fill in the fields:
- Column Name (Mandatory)
- Category
- Description
6.b. Click the button, 'Save'
A Custom Field Integer is added to SiteAudit
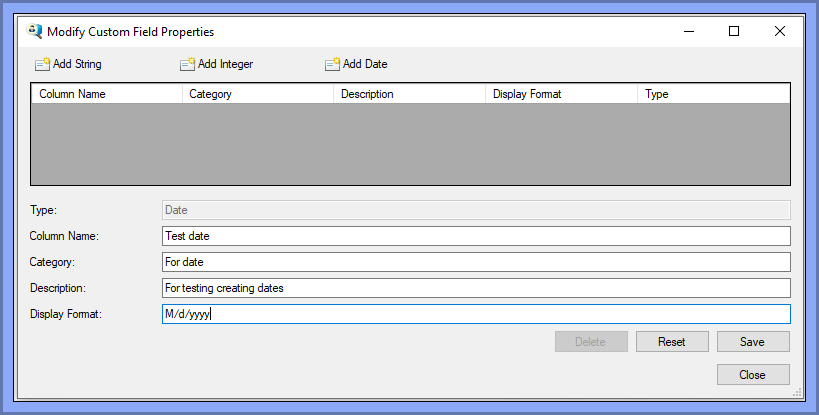
Add Date
4.c. Click the button, 'Add String'
5.c. Fill in the fields:
- Column Name (Mandatory)
- Category
- Description
6.c. Click the button, 'Save'
A Custom Field Date is added to SiteAudit
Delete a Custom Field
1. Select the Custom Filed to be deleted
2. Click the button, 'Delete'
Viewing the Custom Fields in SiteAudit
1. Open SiteAudit Viewer
2. Click on the Inventory Tab
3. Right Click the column header
4. Select the 'Column Chooser''
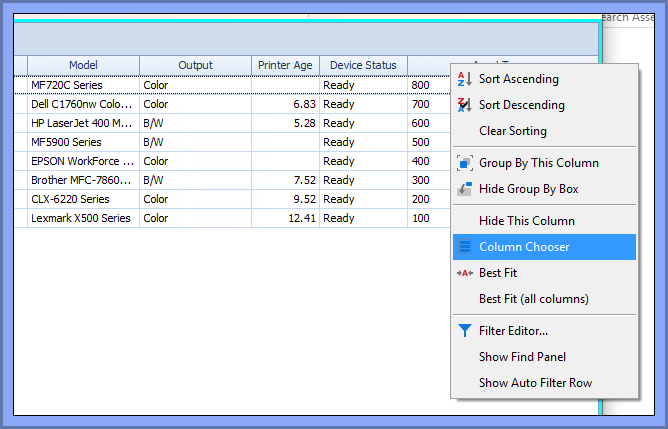
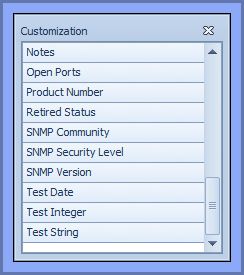
'Customization' window appears
5. Double-Click on the custom fields that were created in order to add them to the SiteAudit Viewer
The Custom Fields Appear in the SiteAudit Viewer
To quickly update Custom Fields
1. Export asset data from the SiteAudit Asset Tool
2. Open the CSV file with excel
4. Modify the Custom Fields
5. Save the modified CSV File
6. Import the modified CSV file with the SiteAudit Asset Tool
7. Verify the imported data is correct in SiteAudit

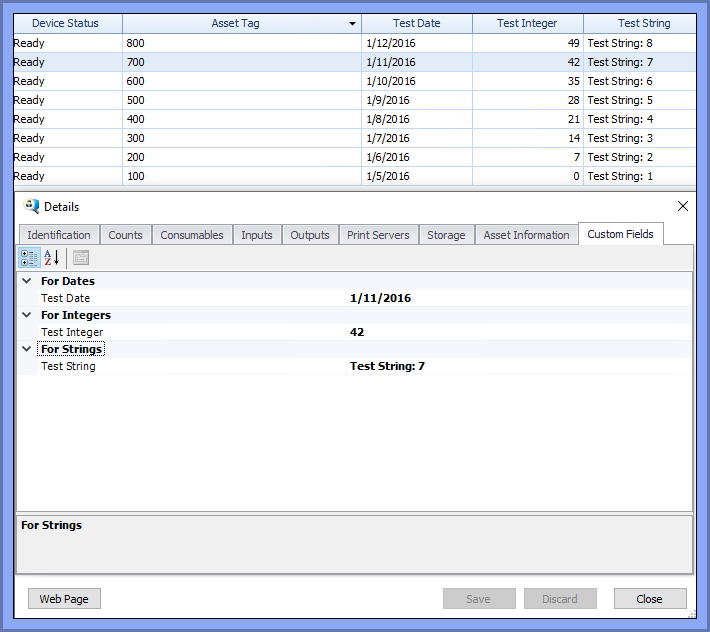
To inspect each printers Custom Fields Closely:
1. Right-Click on the printer that should be inspected
2. Click the 'Custom Fields' tab
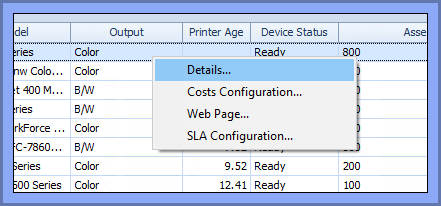
3. Click the 'Custom Fields' tab