Preparing IIS for the Reporting Web Site
This document describes how to prepare Microsoft Internet Information Services for installation of the Netaphor SiteAudit™ Reporting Web Site (RWS).
Before you prepare Microsoft Internet Information Services (IIS) for the Reporting Web Site, you should do the following:
Contents
Important Next Steps
After you prepare IIS, you must:
Supported Platforms
The supported browser for viewing the Reporting Web Site Edge Chromium, Chrome or Firefox.
Installing IIS
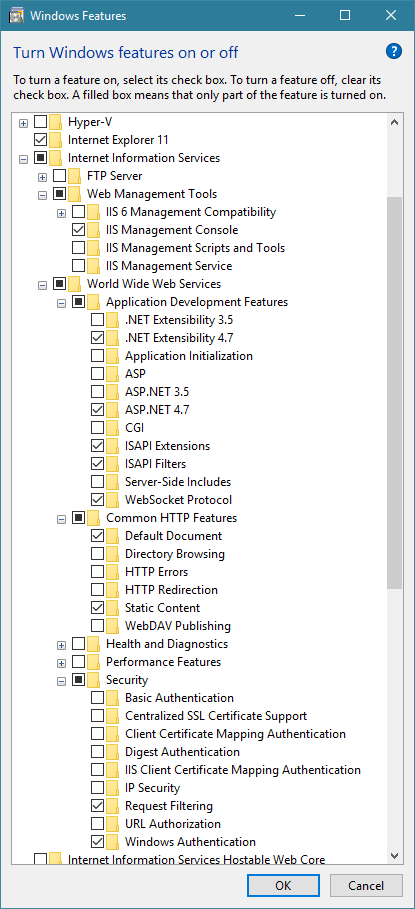
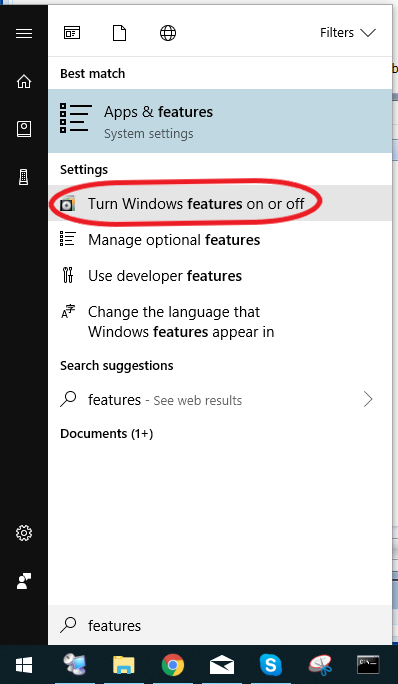
- Click Start, type "Windows features", a search box will not initially appear, and click Turn Windows features on or off.
- Make sure that the following check boxes are selected:
- Internet Information Services
- Web Management Tools
- World Wide Web Services
- Application Development Features
- .NET Extensibility 4.x
- ASP .NET 4.x
- ISAPI Extensions
- ISAPI Filters
- WebSocket Protocol
- Common HTTP Features
- Default Document
- Static Document
- Security
- Request Filtering
- Windows Authentication
3. Click OK.
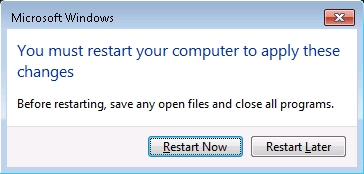
4. If prompted to do so, restart the computer.
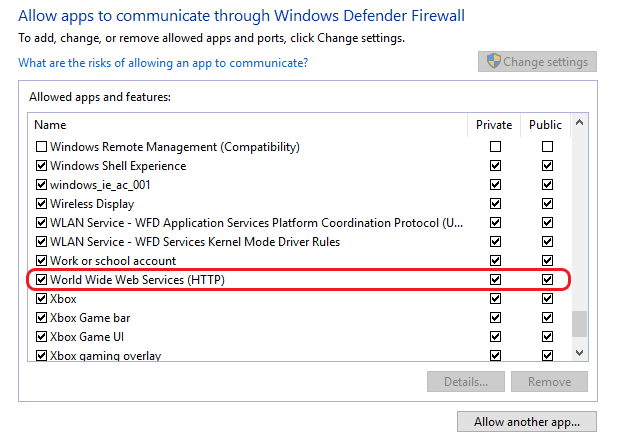
5. If Windows Firewall is enabled, allow HTTP through the firewall:
- Click Start, type Windows Firewall into the search box, and click Allow a program through Windows Firewall.

- Click Change Settings.
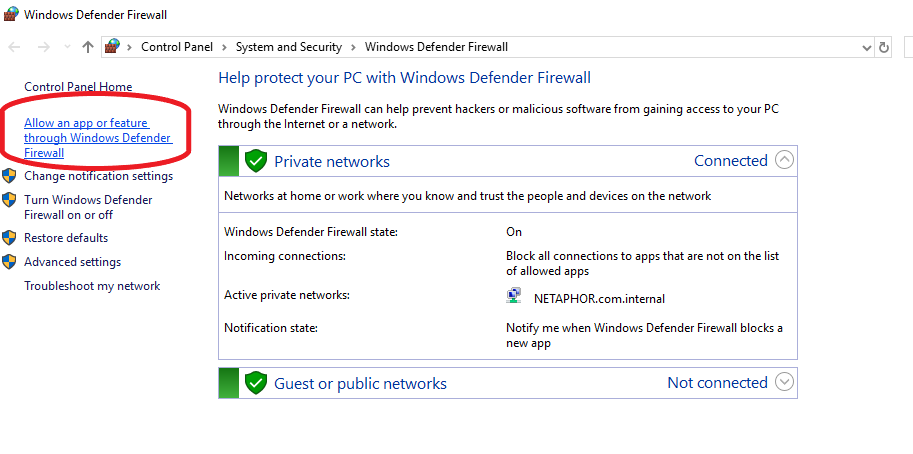
- Select the World Wide Web Services (HTTP) check box, and click OK.
Securing Reporting Web Site FoldersBy default, all users who have access to the Reporting Web Site can see all folders and reports that exist. It is possible to limit access to RWS folders to specific users. Folders are invisible to users who are denied access to them. This folder security is handled in the web.config file in the root folder of the RWS.
A section in the web.config is called “location.” Here you can define the path (the folder) that requires special access privileges. A common technique is to create groups, assign users to them, and allow or deny folder access to groups. You can allow or deny folder access to individuals as well.
In the example below, only users in the RWSInventoryUsers group will see the Inventory folder in the RWS. Again, you can define specific users in the group who can access the folder. An example user is: domain/username
<location path="MyReports/Inventory">
<system.web>
<authorization>
<allow roles="RWSInventoryUsers" />
</authorization>
</system.web>
</location>
The RWSInventoryUsers group contains the list of users who are permitted to view reports in the MyReports/Inventory folder.
This Microsoft knowledge base article provides additional details: http://support.microsoft.com/kb/316871