This article provides a step-by-step guide on importing an organization hierarchy into SiteAudit. You will find an attached import template file at the end of this article, which serves as a convenient tool for importing your organization's hierarchy. This template allows you to import both the organization structure and the areas of your network where printers are located. SiteAudit automatically assigns the respective print devices to the defined areas within your organization. This streamlined approach enables you to effortlessly locate printers, generate reports, and conduct in-depth analysis across your entire organization or within specific departments.
It is advisable to consult with your IT personnel to obtain a comprehensive list of printer IP addresses, ranges, and networks. Once you have obtained this list, it can be easily imported into SiteAudit, ensuring accurate and complete coverage of your printer inventory.
Organization Import Template
Quick Start
- Open SiteAudit to the database where you would like to import the Hierarchy.
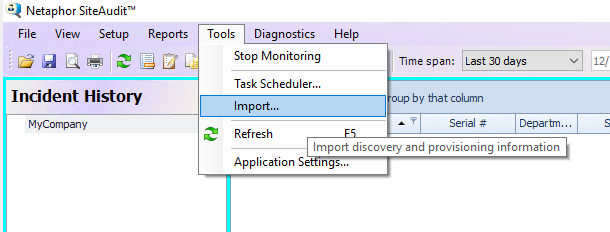
- Click "Tools" and select "Import...".
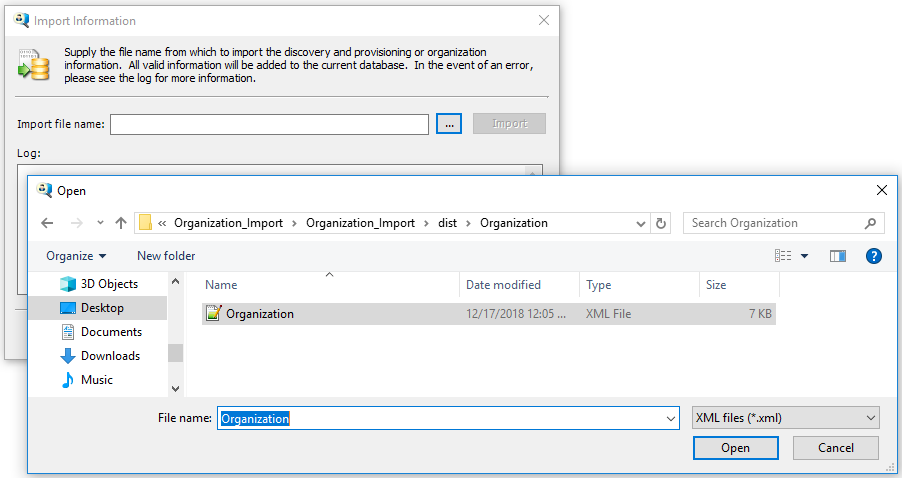
- Click the "..." button to the right of the Import file name box.
- Find the Organization.xml.
- Click "Import".
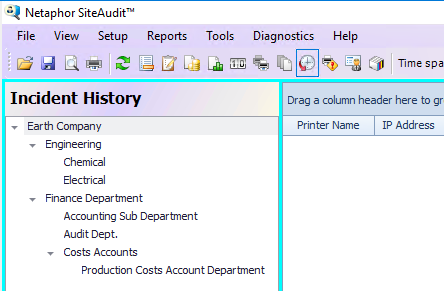
- The company data should display on the left of SiteAudit.
Create a New Organization
A CSV file is used to define the organization and discovery information. This file can be easily edited using Microsoft Excel.
Please note that the Asset Tool expects a CSV (comma-separated file). When using Microsoft Excel, ensure it is configured to open/save files in CSV format.
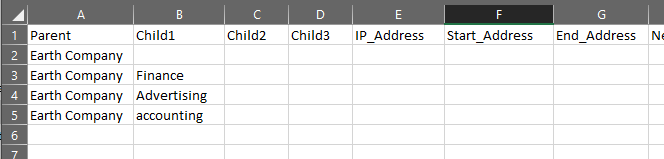
Step 1: Download the Organization_Import_Template.csv at the bottom of this page.
Step 2: Open the csv file with Microsoft Excel.
Step 3: Put the company name underneath the Parent Column.

Step 4:
a) Add a second row.
b) In the second row, type the company name underneath the Parent column.
c) In the second row, type the sub-department name underneath the Child1 column.

The result will appear as:

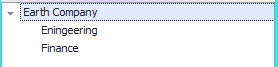
Step 5:
a) Add a third row.
b) In the third row, type the company name underneath the Parent column.
c) In the third row, type a new sub-department name underneath the Child1 column.
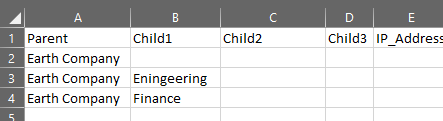
The result will appear as:
Step 6:
a) Add a fourth row.
b) In the fourth, type the company name underneath the Parent column.
c) In the fourth, type a new sub-department name underneath the Child1 column.
The result will appear as:
Import the Organization Template
Once the Organization_Import_Template.csv file has been configured, Netaphor Support will be compile and ready the file for importing.
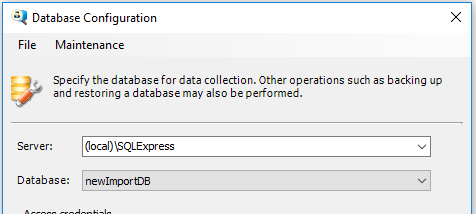
Step 1: Open SiteAudit and select a database where you would like to import the organization.
a) Select the 'Setup' tab and the click 'Database...'
b) To the right of the word 'Database:' click the drop down menu and select the database that will be used to import and store the organization information.
Step 2: Using SiteAudit's Import functionality, import Organization.xml.
a) Select the Tools tab in SiteAudit and then select the Import...
b) Type in the path to your Organization.xml file or click the button '...' and then navigate to the Organization.xml file
In the example below, the path is: C:\Users\siteaudit\Desktop\Organization_Import\Organization_Import\dist\Organization\Organization.xml
The resulting organization should appear similar to the example below:
Quick Examples
Below are examples on creating organizations:
Example 1: Create an Organization using SiteAudit
Creating an Organization by using SiteAudit
Step a: Right click on 'MyCompany' on the left hand side of the screen and then select 'Company Organization...'

Step b: Select the department in which you want to create the child and then click 'Add Department' button.
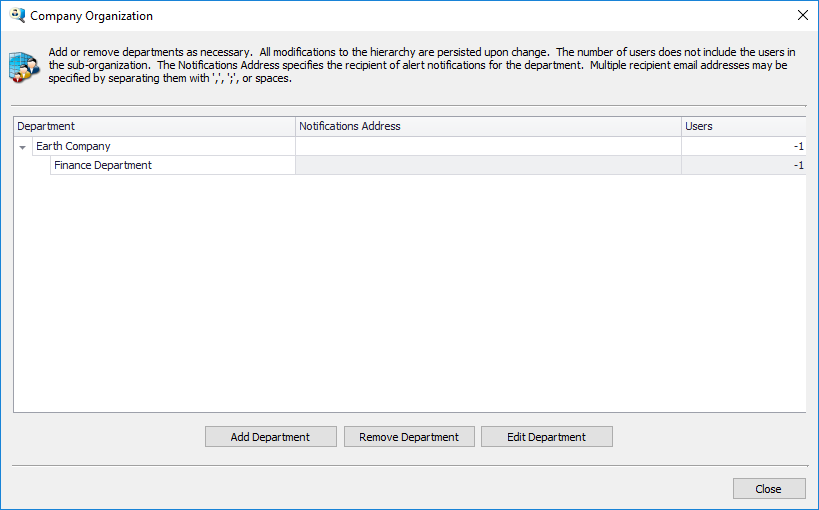
The result after adding a department:
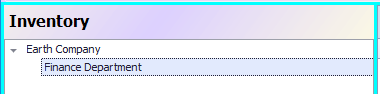
Example 2: Create an Organization using SiteAudit
Use SiteAudit to create an Organization with Multiple sub-departments.
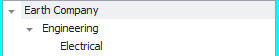
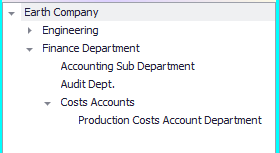
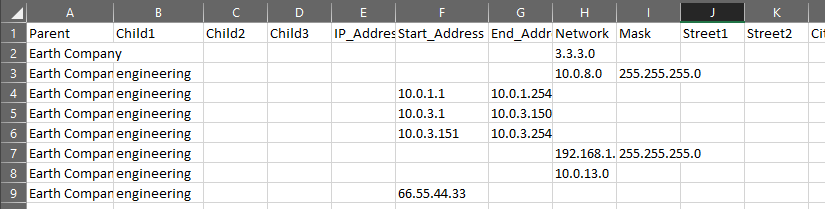
In the example below, 'Earth Company' is the Parent in the organization. The sub-department 'Engineering' is a Child1 of 'Earth Company.' Furthermore, the sub-department 'Chemical' is Child2 of 'Earth Company.'

The result after adding multiple departments:
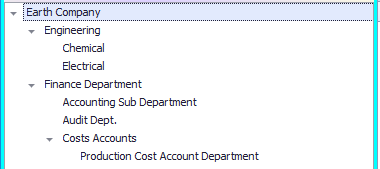
Example 3: Create Three Children
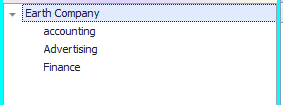
Create three children in the Child1 column.
The result after importing:
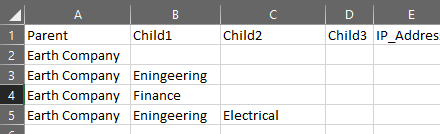
Example 4: Create Two children Using the Columns Child1 and a Child2
How to create a Parent and a Child1 and a Child2:

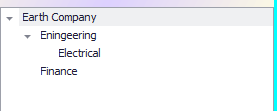
The result after importing:
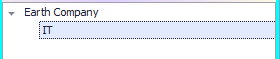
Example 5: Add an IP Range
Add an IP range:

The result after importing:
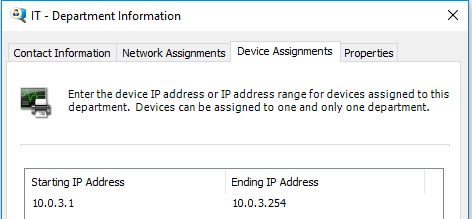
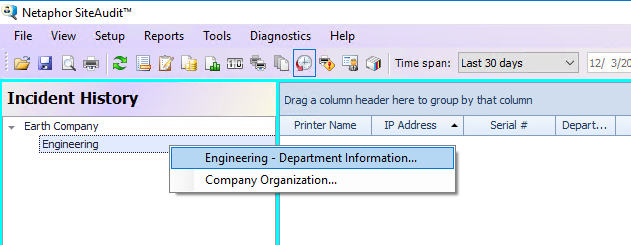
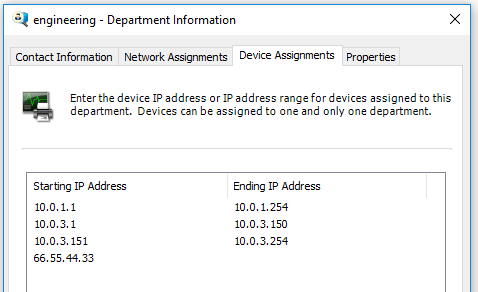
Verify that the IP Range was imported, in this example, right click on the IT sub-department' and then select 'IT - Department Information...' then select the tab 'Device Assignments':
Example 6: Create Optional Information
Optional information:

The result after importing:

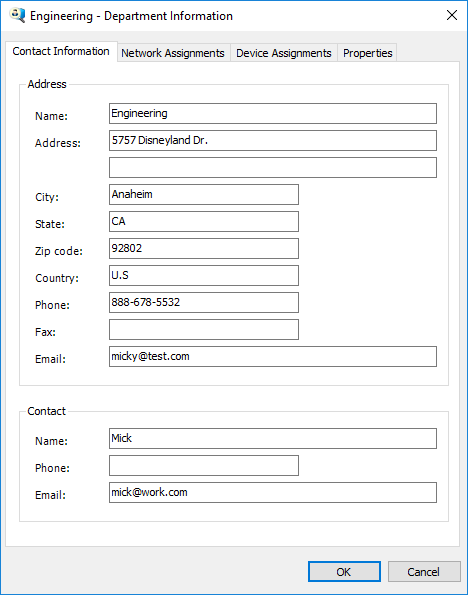
Verify that the information was imported, in this example, right click on Engineering and select 'Engineering - Department Information...':
Facts
Fill out the columns of Organization_Import_Template.csv according to the specifications:
The Parent column is the company name.The Child1 column is a sub-department of the Parent (company)The Child2 column is a sub-department of the Parent (company) and Child1 (sub-department)The Child3 column is a sub-department of the Parent (company) and Child1 (sub-department) and Child2 (sub-department)1. For every department, there should only be at most 1 Address ([Street1], [Street2], [City], [State], [Zip], [Country]). If an Address is listed twice for the same department, regardless if it's the same or not, it will create an invalid Organization.xml file.
2. IP addresses, Networks, and IP Ranges, must be assigned to a child (sub-department)
With these standards in mind, create as many columns as necessary. Organization_Import_Template.csv is currently set up in such a way where parent departments are separated by an empty column, though this is not required either
The csv file can be opened with Microsoft Excel for editing.

The Excel example above can produce the same results as if the organization was created in SiteAudit
Option Information
All information is optional, besides from the Parent column, such as: - Street name, Phone, Contact, IP addresses, etc.
The example below demonstrates an organization without any optional information:

Result after importing:
Networks, IP Ranges, and IP addresses
Importing - networks or IP addresses: - At least one sub-department to assign networks or IP addresses.
- If a sub-net mask is not provided, then the mask '255.255.255.0' will be the default mask.
If only a starting IP address is provided, then only that IP address will be monitored.Below are some examples of incorrect input that may cause an error:
If the IP Address and Networks are out of range, the file will not be imported correctly.If the sub-net mask is incorrectly added the default will be used '255.255.255.0'The example below just uses IP addresses:
In order to ensure that the Networks, IP ranges, and IP addresses have all been added, Right click on the department that was imported and then select '... - Department Information...', as shown in the example below:
Select the tab 'Device Assignments' and check that the IP addresses and ranges were imported properly.
Click the tab 'Network Assignments' to ensure all the networks were imported correctly.

Delete the Organization
In order to delete the organization hierarchy you must import a new XML file.
Attached Files


