Providing SiteAudit Database Access
To access the Netaphor SiteAudit™ database, a user must have owner privileges first. This article describes how to give new users access to the SiteAudit database.
Once the SiteAudit administrator is able to access the SiteAudit database, it is possible to create new SQL users and roles from within SiteAudit in order to provide access for other users. Refer to the Functional Security articles to learn how to provide role access for users
Contents
Before You Begin
Determine your authentication method for database access
The process of giving a user privileges for database access differs depending on whether you use integrated security (Windows authentication) or SQL authentication.
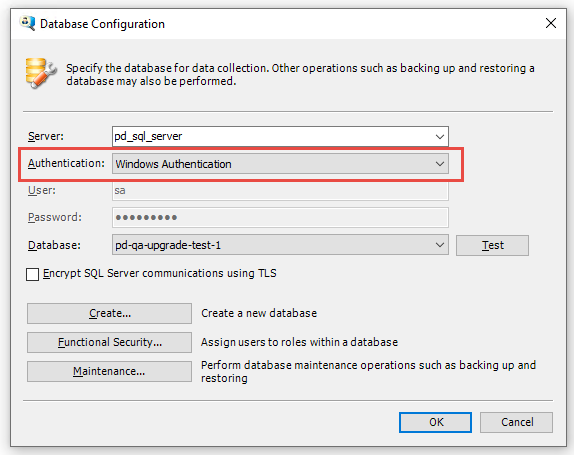
To see which kind of authentication you use: On the Setup menu, click Database. If the Windwos Authentication is selected, you are using integrated security. If it is not selected, you are using SQL authentication.
SiteAudit version 6.8 supports SQL Servers 2016 and 2017. Version 7.0 and later support SQL Server 2019
Install SQL Server Management Studio
If your installation of SQL Server does not include SQL Server Management Studio, you should download and install it. For example, if you installed SQL Server 2016 Express from the Netaphor web site, you should go to http://www.microsoft.com/en-us/download/details.aspx?id=30438 and download SQLManagementStudio_x64_ENU.exe (for 64-bit Windows) or SQLManagementStudio_x86_ENU.exe (for 32-bit Windows).
Integrated Security
If you use integrated security, the Windows user name and password of the user who is logged into Windows are passed to SQL Server.
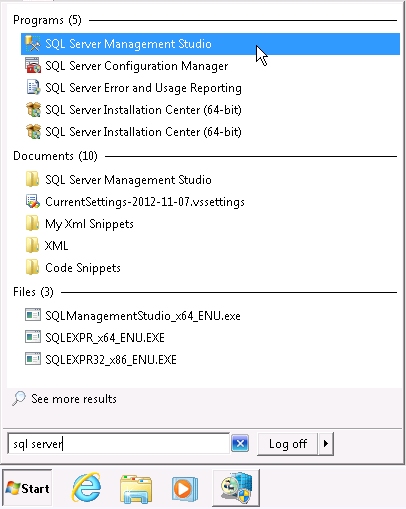
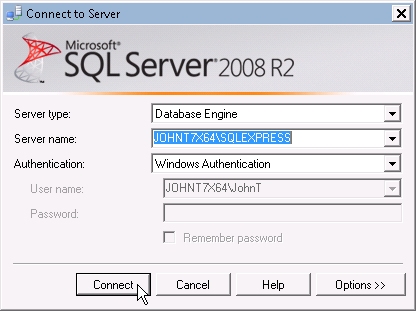
- Click Start, type SQL Server in the search box and click SQL Server Management Studio.
- Connect to SQL Server.

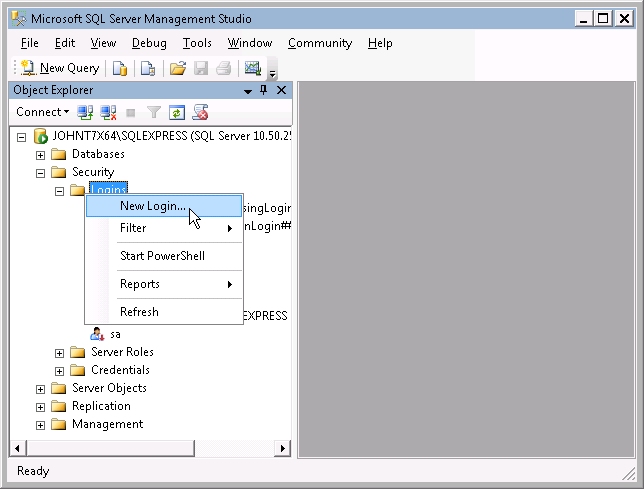
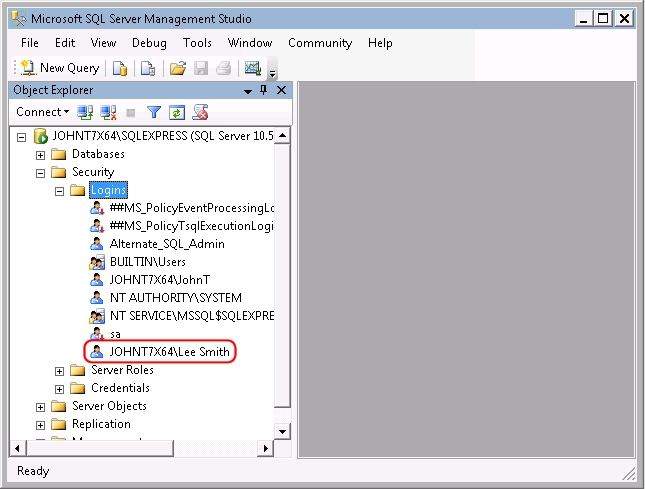
- Expand the Security node and the Logins node.
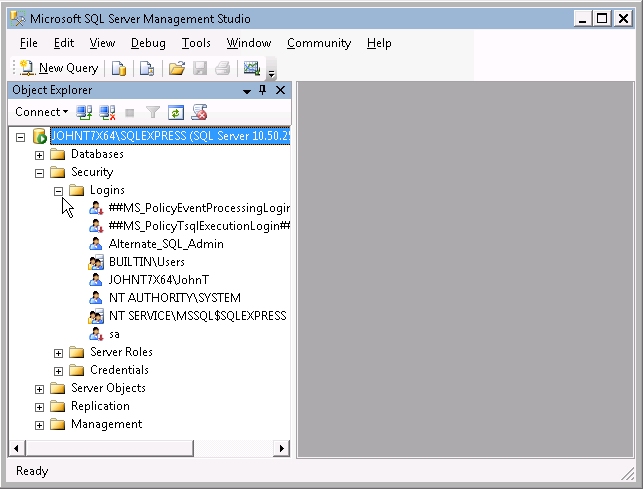
Listed below Logins are the users who have permission to access SQL Server.
- Right-click Logins and click New Login.
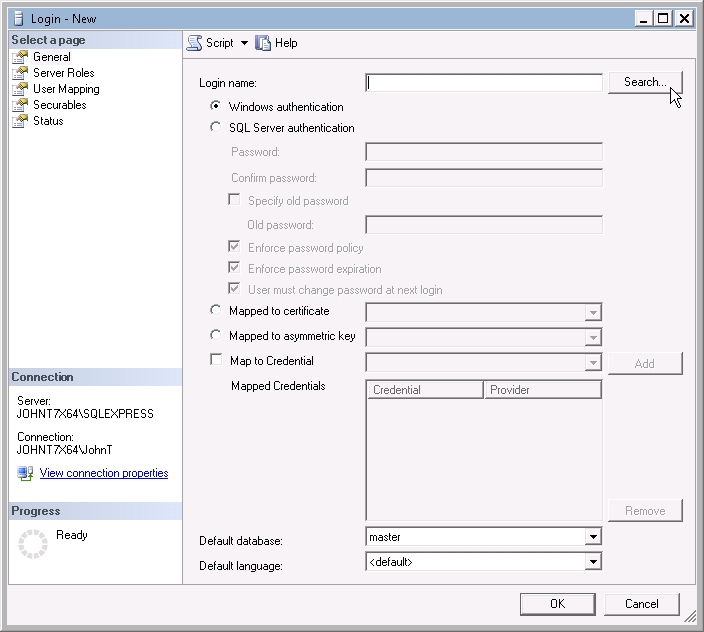
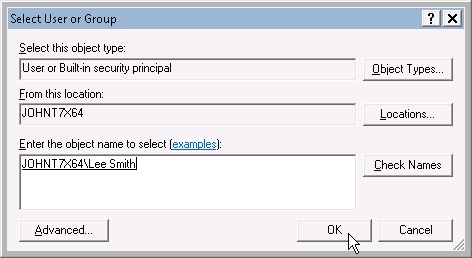
- Make sure that the Windows authentication option is selected, and click Search.
- If necessary, click Locations and select the needed domain or other location.
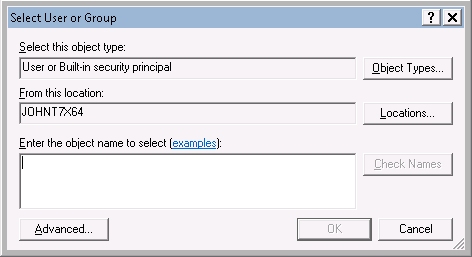
- Type the name of the user to be added, and click Check Names.
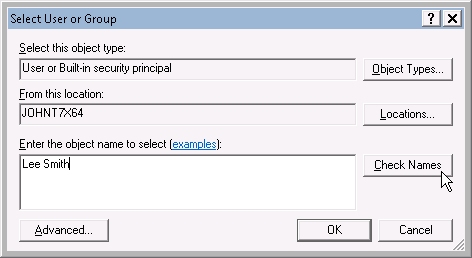
- Click OK.
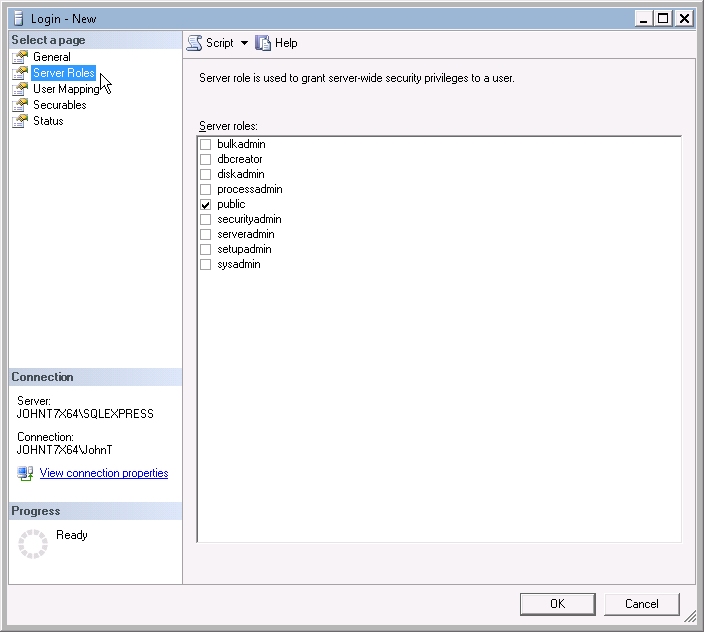
- Click Server Roles and make sure that the public check box is selected.

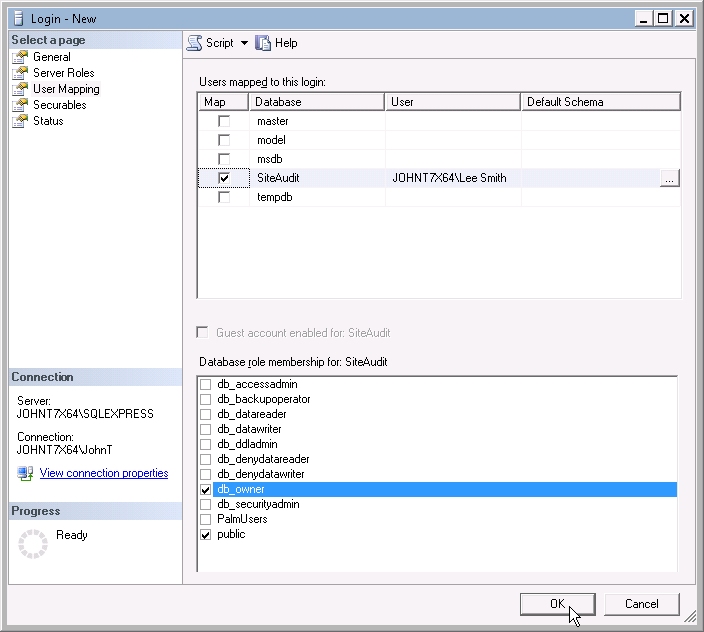
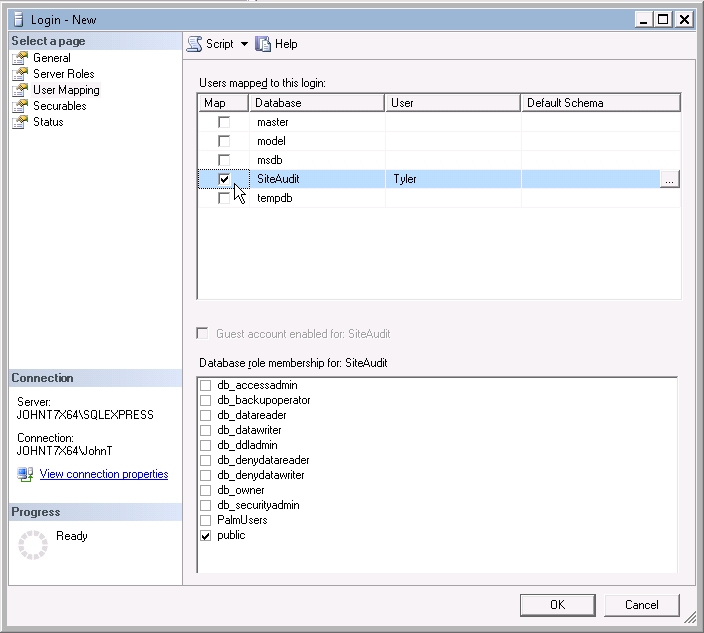
- Click User Mapping.

- Select the check box for your SiteAudit database.
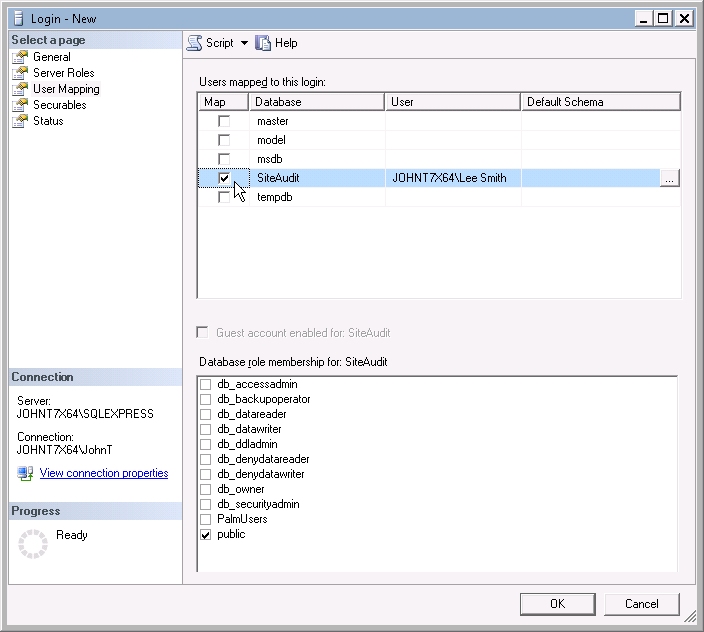
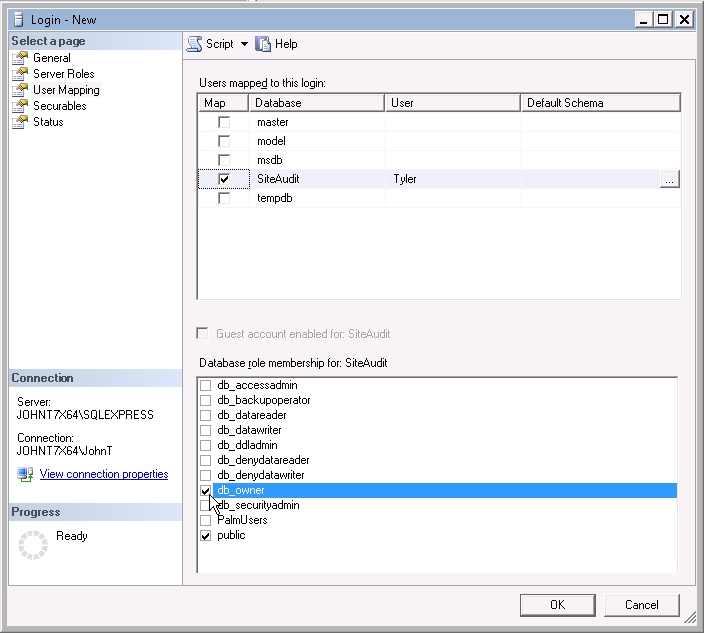
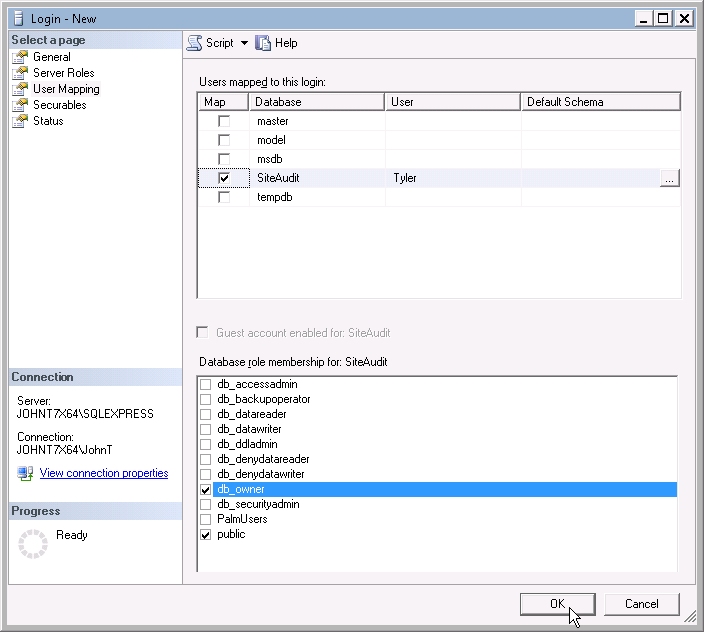
- Select the db_owner check box.

- Click OK.
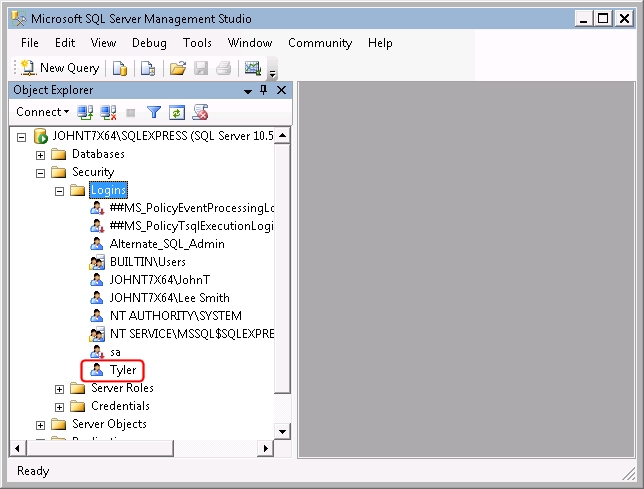
The user is now in the list of users who have access to the SiteAudit database when they are logged on to Windows.
Now when user JOHNT7X64\Lee Smith logs into the machine, he should be able to access the SiteAudit database by using Integrated Security as shown below. To confirm, click the Test button to ensure the connection succeeds.
SQL Security
- Click Start, type SQL Server in the search box and click SQL Server Management Studio.

- Connect to SQL Server.
- Expand the Security node and the Logins node.

Listed below Logins are the users who have permission to access SQL Server.
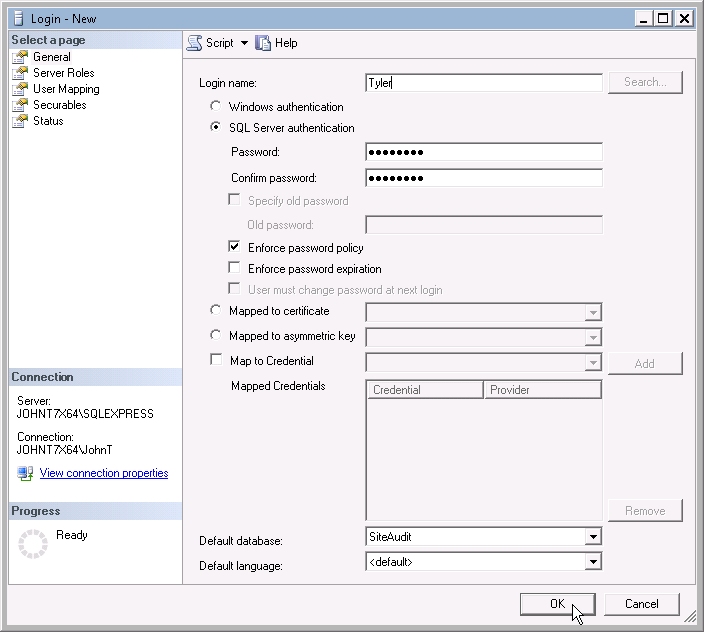
- Right-click Logins and click New Login.

- Do the following:
- Type the new user's Login name.
- Click SQL Server authentication.
- Make sure that Enforce password expiration is not selected.
This prevents problems that can occur if a password is changed.
- Click Server Roles and make sure that the public check box is selected.
- Click User Mapping.
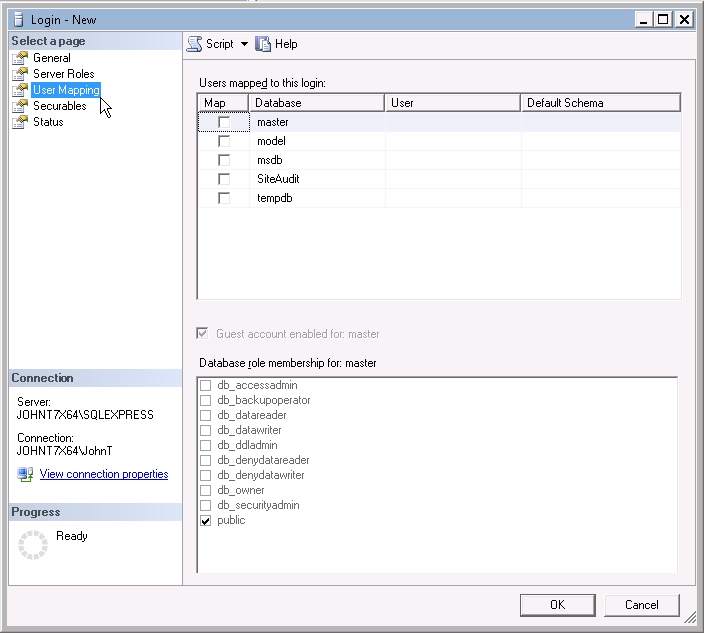
- Select the check box for your SiteAudit database.
- Select the db_owner check box.
- Click OK.
The user is now in the list of users who have access to the SiteAudit database.
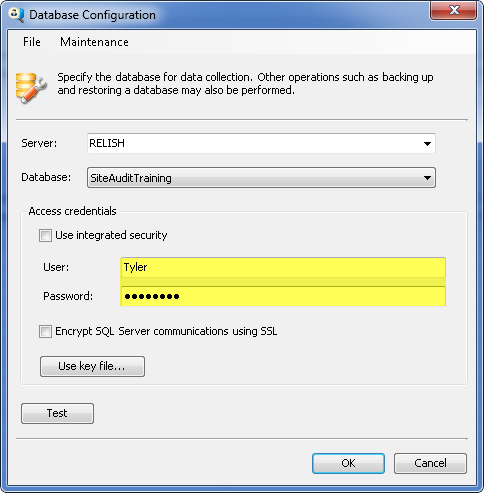
At this point, one can enter the credentials for Tyler to access the SiteAudit database as shown below. Click the Test button to confirm that it succeeds.