Working with the Organization Structure has been enhanced in SiteAudit v4.4 with organizational importing and automatic printer assignment. Used with Move, Add and Change tracking it provides the highest level of inventory reporting and alerting.
Feature Description
SiteAudit provides the capability to easily create a hierarchical organization structure for managing printers. The structure can represent departments, locations or any other ‘container’ used to hold printers. The structure allows subunits to be added or removed as required by the organization. All printers are displayed at the top of the hierarchy.
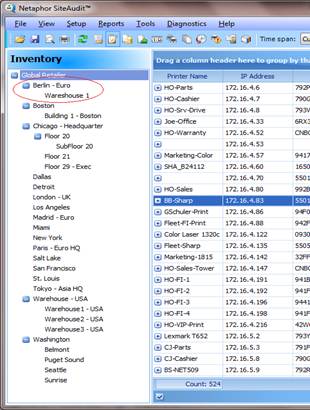
What is new in SiteAudit v4.4 is organizational importing and the association of addresses, ranges and networks with the structure. For example, an IP range can be associated with the location Berlin. Any printer installed or added in this range will automatically be placed in the location Berlin. Or if a printer is removed for service and then returned at a different IP range it gets automatically assigned to the new location and an alert and report will track this change. This automation reduces the costs to IT managers responsible for tracking and reporting inventory management. (see figure 1.)
Additional key benefits include:
ü Printer location visibility
ü Inventory accuracy
ü Lower costs for managing inventory changes
ü Reporting for printer department changes
ü Alerting for printer department changes
Figure 1: Hierarchical Organizational Structure
Described next is how to create an organization structure. There are two ways to accomplish this. The first is by manually creating the organization and the second is done by using an import mechanism.
The SiteAudit Asset Tool is installed with SiteAudit version 7.0 and later and provides an easy way to create an import the organization hierarchy. To learn more about this, refer to the SiteAudit Asset Tool support article.
Manually Creating the Organizational Structure
For smaller organizations manually creating the organization structure is time efficient. The steps are simple and recounted below.
Step 1: Adding the Organization Name and Address
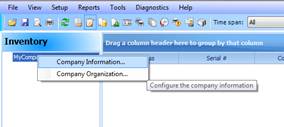
- Right click on My Company
- Select Company Information
- Enter Company Information
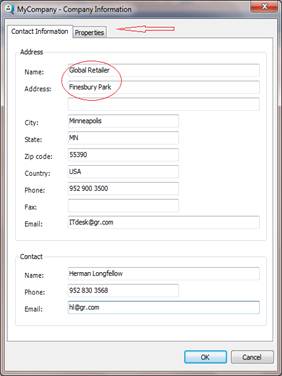
The Company Name begins the hierarchical structure.
Select Properties to add a Departmental Comment or Note. For example, date when organization structure was created.
Step 2: Add the number of employees (users)
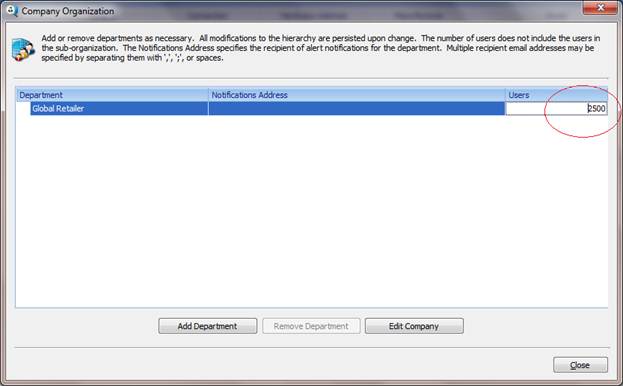
Select Company Organization
- Enter the number of users
The number of users is an important metric for the Analysis Summary view. It provides the data for:
ü Users per Device
ü Pages per User
Step 3: Constructing the Organization
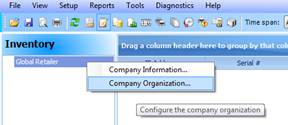
- Right click on 'Global Retailer'
- Select Company Organization
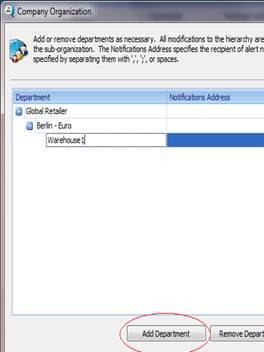
- Select Add Department
- Enter Department name, ‘Berlin’
- Select the Department to add a Sub department ‘Warehouse1’
- Right click on 'Global Retailer'
- Select Company Organization
- Select Add Department
- Enter Department name, ‘Berlin’
- Select the Department to add a Sub department ‘Warehouse1’
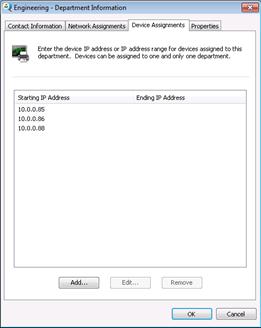
Step 4: Add Addresses, Ranges or Networks
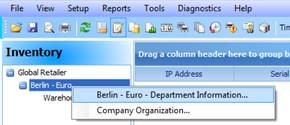
- Right click on the Department ‘Berlin’
- Select Department Information
- Add Contact Information
Select Addressing tab for Printer Assignment
Example:
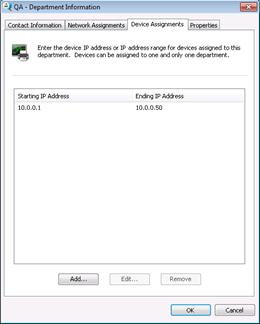
- Device Assignment
- Enter Range
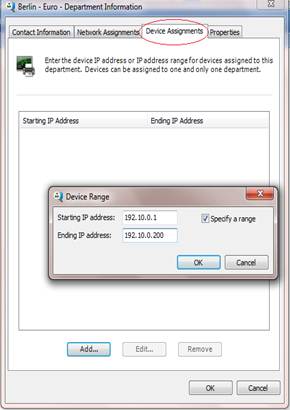
Printers within the Range will automatically be assigned to this department. In addition a MAC event will be added into the Incident History view for reporting and alerting.
Importing the Organizational Structure.
Typically larger organizations will find create an import simpler and faster than manually creating the organization structure. This section reviews the process for doing that.
The Organization Import feature makes it possible to import company and department information into a SiteAudit database using an XML import file document that describes the data to import. Importing organization data will delete any existing Company or Department data (including any address and printer assignment information) and then import the new data.
SiteAudit supports one company and 0 or more departments inside the company. Printers can then be automatically assigned to a department based on printer assignment ranges or networks specified in the import file. A department can have 0 or more printer assignment ranges or networks. After import, devices will be automatically assigned to their designated departments.

Printer assignment by IP address:
· IP address (IPAddress)
Printer assignment IP range information:
· Start address (StartAddress)
· End address (EndAddress)
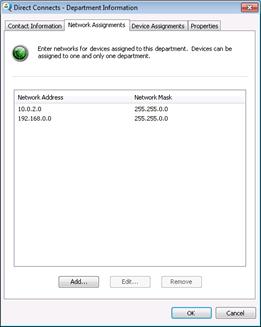
Printer assignment network information:
· Network address (NetworkAddress)
· Mask - can be specified as a network mask or a CIDR value
Import Procedure
The XML import document containing the desired import data must be created prior to importing data into SiteAudit. A sample import document, SiteAuditOrganizationImport.xml, is installed in the SiteAudit Sample/en (English) folder. This document can be copied and modified to import data for a specific environment.
To import data into a SiteAudit database, launch the Import Information dialog by selecting Import… from the Tools menu.
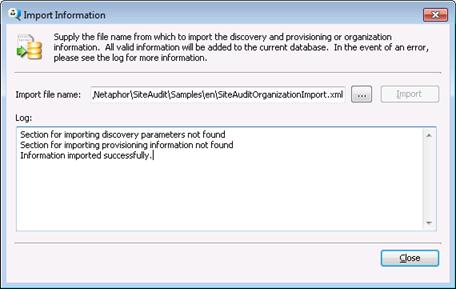
Click the  button to navigate and select the import document.
- Click the Import button to start the import.
Once the import process completes, a popup dialog appears and indicates if the import process succeeded or if errors occurred. The Log: text area will indicate which import data was imported and which sections were not found.
NOTE: Discovery and provisioning information cannot be imported in the same import file that contains organization information. To import discovery and/or provisioning information, use a separate import file.
Company and Department Examples: Importing company and department information
Every organization import file must have one Company element. Within a company, zero or more departments can be specified. The only required element for a Company is CompanyName. The only required element for a department is DepartmentName.
Address information can be specified for a Company or Department, but is optional.
Printer Assignment Examples: Importing printer assignment information
Printer assignment information can be optionally specified for any department. This information can be entered in the form of a device IP address, IP address range, or a network. See the examples below.
|
<!--Example importing printer assignment by IP Address-->
<SiteAudit xmlns="http://tempuri.org/SiteAuditImportSchema.xsd">
<Import>
<Organization>
<Company>
<CompanyName><![CDATA[My Company]]></CompanyName>
<Departments>
<Department>
<DepartmentName>Engineering</DepartmentName>
<PrinterAssignment>
<Devices>
<IPAddress>10.0.0.85</IPAddress>
<IPAddress>10.0.0.86</IPAddress>
<IPAddress>10.0.0.88</IPAddress>
</Devices>
</PrinterAssignment>
<Departments>
<Department>
<DepartmentName>QA</DepartmentName>
</Department>
</Departments>
</Department>
<Department>
<DepartmentName>Other</DepartmentName>
</Department>
<Department>
<DepartmentName>Direct Connects</DepartmentName>
</Department>
</Departments>
</Company>
</Organization>
</Import>
</SiteAudit> |
|
|
<!--Example importing printer assignment by range -->
<SiteAudit xmlns="http://tempuri.org/SiteAuditImportSchema.xsd">
<Import>
<Organization>
<Company>
<CompanyName><![CDATA[My Company]]></CompanyName>
<Departments>
<Department>
<DepartmentName>Engineering</DepartmentName>
<Departments>
<Department>
<DepartmentName>QA</DepartmentName>
<PrinterAssignment>
<Ranges>
<Range>
<StartAddress>10.0.0.1</StartAddress>
<EndAddress>10.0.0.50</EndAddress>
</Range>
</Ranges>
</PrinterAssignment>
</Department>
</Departments>
</Department>
<Department>
<DepartmentName>Other</DepartmentName>
</Department>
<Department>
<DepartmentName>Direct Connects</DepartmentName>
</Department>
</Departments>
</Company>
</Organization>
</Import>
</SiteAudit> |
|
|
<!--Example importing printer assignment by network (using CIDR and network mask-->
<SiteAudit xmlns="http://tempuri.org/SiteAuditImportSchema.xsd">
<Import>
<Organization>
<Company>
<CompanyName><![CDATA[My Company]]></CompanyName>
<Departments>
<Department>
<DepartmentName>Engineering</DepartmentName>
<Departments>
<Department>
<DepartmentName>QA</DepartmentName>
</Department>
</Departments>
</Department>
<Department>
<DepartmentName>Other</DepartmentName>
</Department>
<Department>
<DepartmentName>Direct Connects</DepartmentName>
<PrinterAssignment>
<Networks>
<Network>
<NetworkAddress>10.0.2.0</NetworkAddress>
<!--CIDR equivalent to 255.255.0.0-->
<Mask>/16</Mask>
</Network>
<Network>
<NetworkAddress>192.168.0.0</NetworkAddress>
<!— Network mask equivalent to CIDR value of /16-->
<Mask>255.255.0.0</Mask>
</Network>
</Networks>
</PrinterAssignment>
</Department>
</Departments>
</Company>
</Organization>
</Import>
</SiteAudit> |
|
Organization Import FAQs
The following list contains frequently asked questions about importing organization data into SiteAudit.
Q: What happens if a device is assigned to multiple departments in an import file?
The printer assignment is unspecified in this case. Users should take care not to assign the same printer to multiple departments in the import document.
Q: What values do optional fields take on if they are not specified in an import file?
Default or blank values are assigned if they are not specified in an import file. Here is a list of default values:
|
Field Name |
Default Value |
|
DowntimeCostPerUserHour |
35.00 |
|
NumberOfUsers |
-1 |
Q: What is imported if there is an error in my import file?
In the case that there is a validation error during import, no changes will be made to the database and nothing will be imported.
Q: Is it possible to import provisioning and discovery data in the same file as an organization import?
No.
Q: What happens to a device that is assigned to a department via import file printer assignment parameters and then it is manually assigned to a different department via the Printer Assignment dialog?
The device’s manual assignment will take precedence because it occurred after the import. Note in the Printer Assignment dialog that when the device is manually moved, there will be a selected checkbox under the “Manually Assigned Department” column to indicate that the device was manually assigned to a department and any network or device assignments for that printer will not take precedence over it. If an import is performed after the manual printer assignment, it will overwrite the manual printer assignment.
Q: If I manually assign networks and ranges to my departments, will the printers automatically go into the department? What about newly discovered printers, will these be automatically assigned to the specified departments?
Yes. Once you’ve entered printer assignments in your Department Information, the printers will automatically move to the department. Be careful not to assign the same printers to more than one department! Also, once any new printers are discovered, they will automatically be placed into the specified department.

